Peer review and creating a trail

With MathCityMap’s student accounts, you can let your students create their own outdoor activities. In addition to the classic math trail, this offers a unique opportunity to explore mathematical concepts. This step-by-step guide will show you how to improve your activities and combine them into a shared trail.

Step 1 – Start the peer review

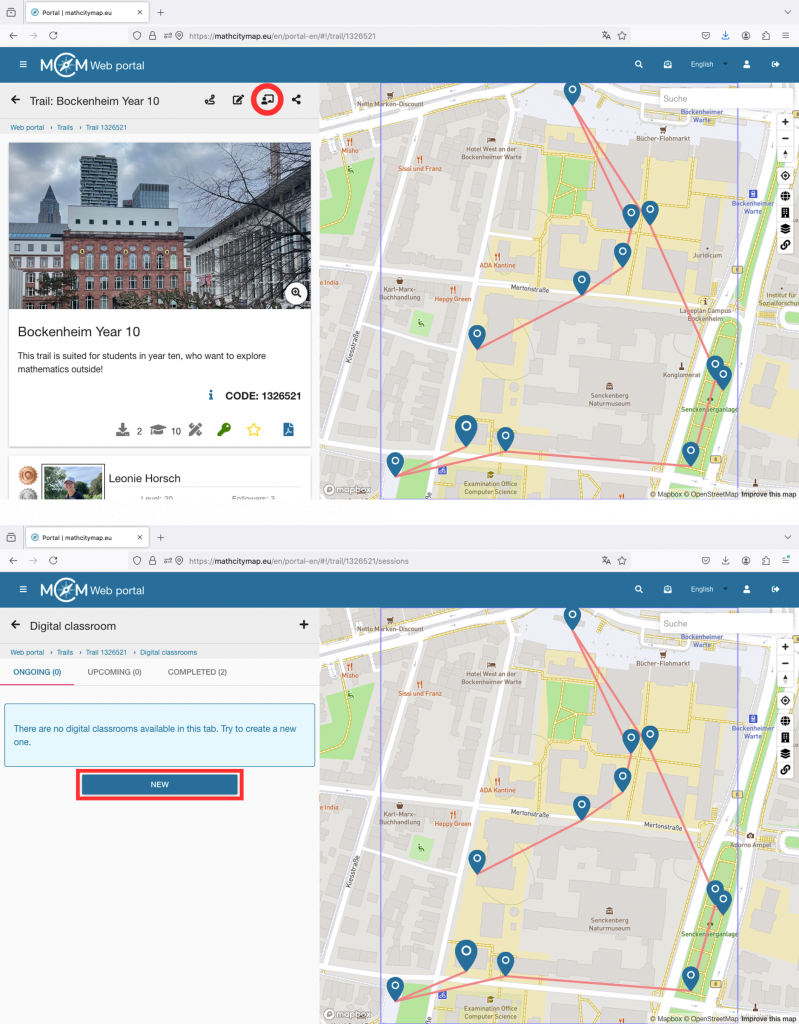
Once your learners have created their assignments in the web portal, you can start the peer review. This means the technical setup of the web portal, allowing your learners to write comments there.

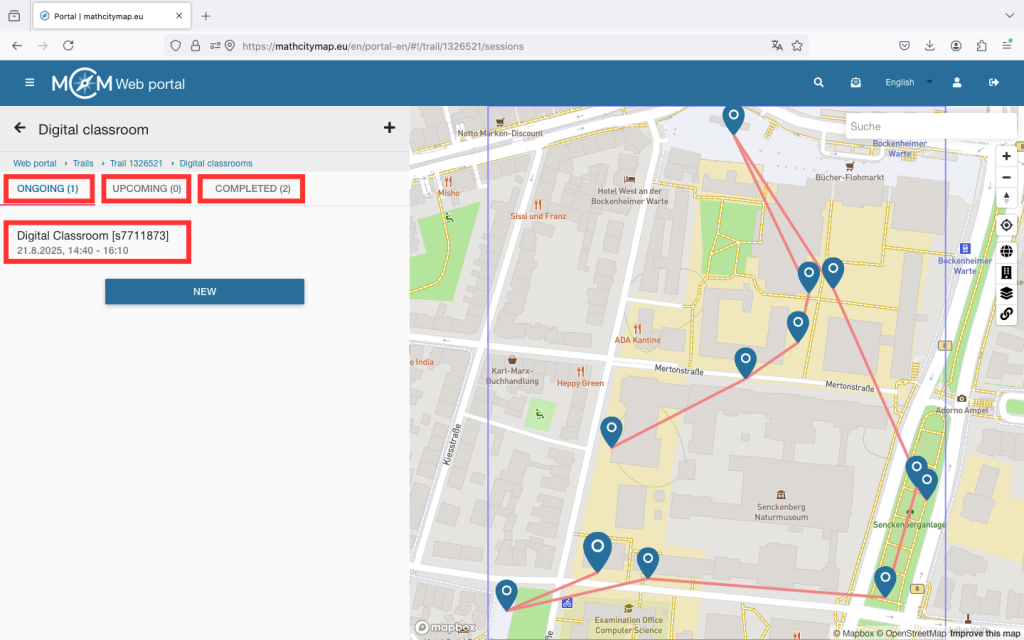
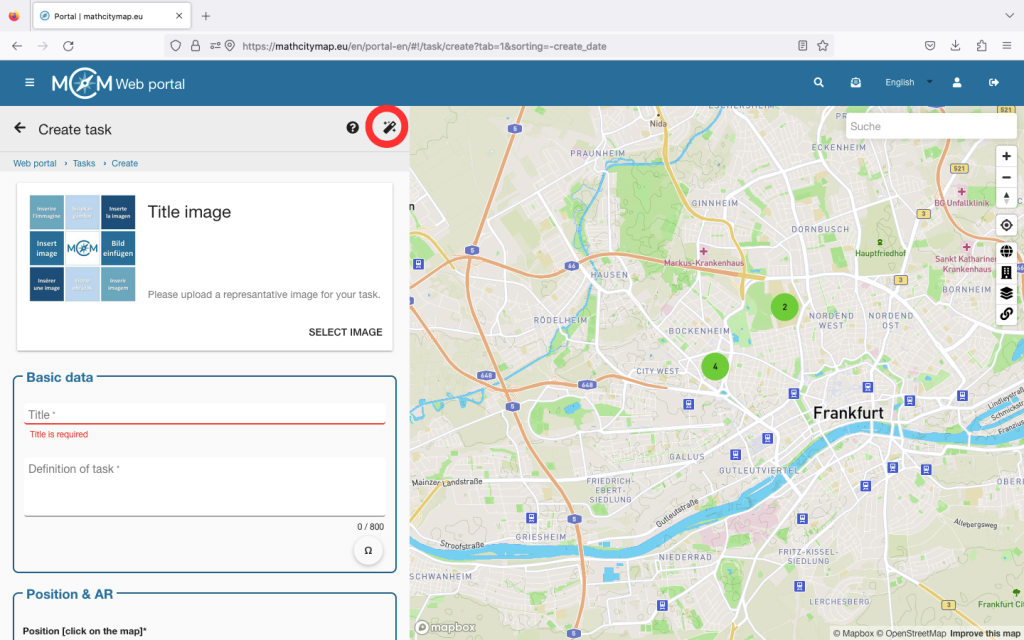
To do this, click on the editing symbol next to your study group and activate peer review.

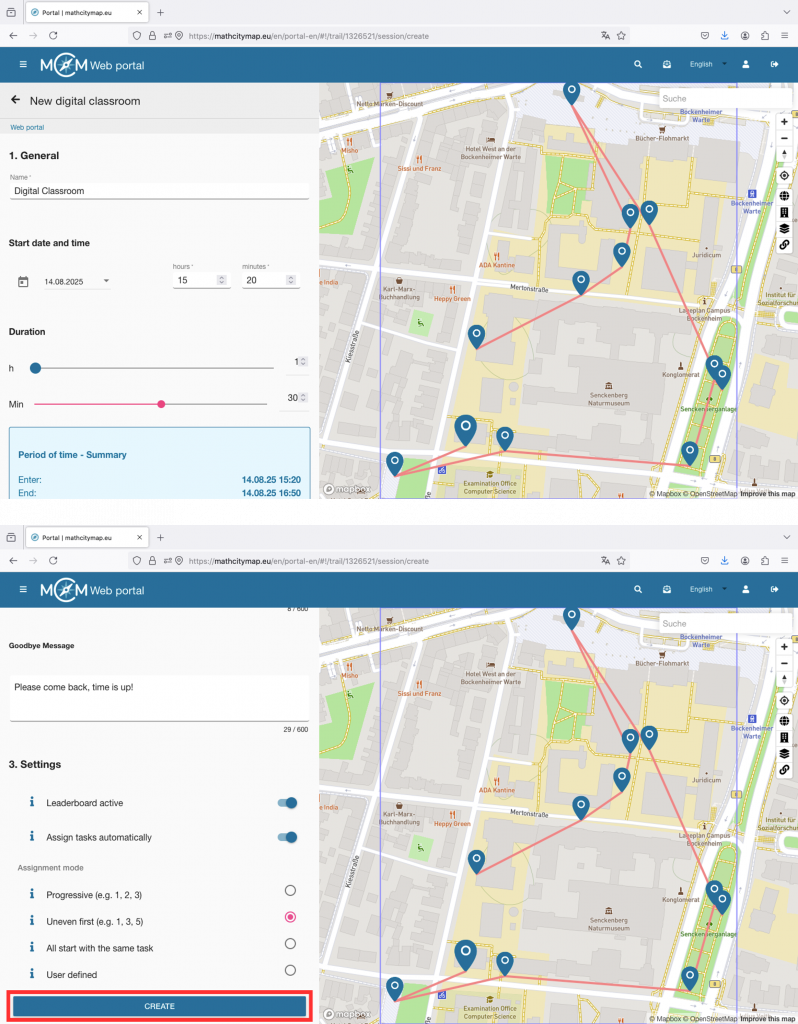
You can also set a start and end time via the review settings.

Step 2 – Organizing the peer review

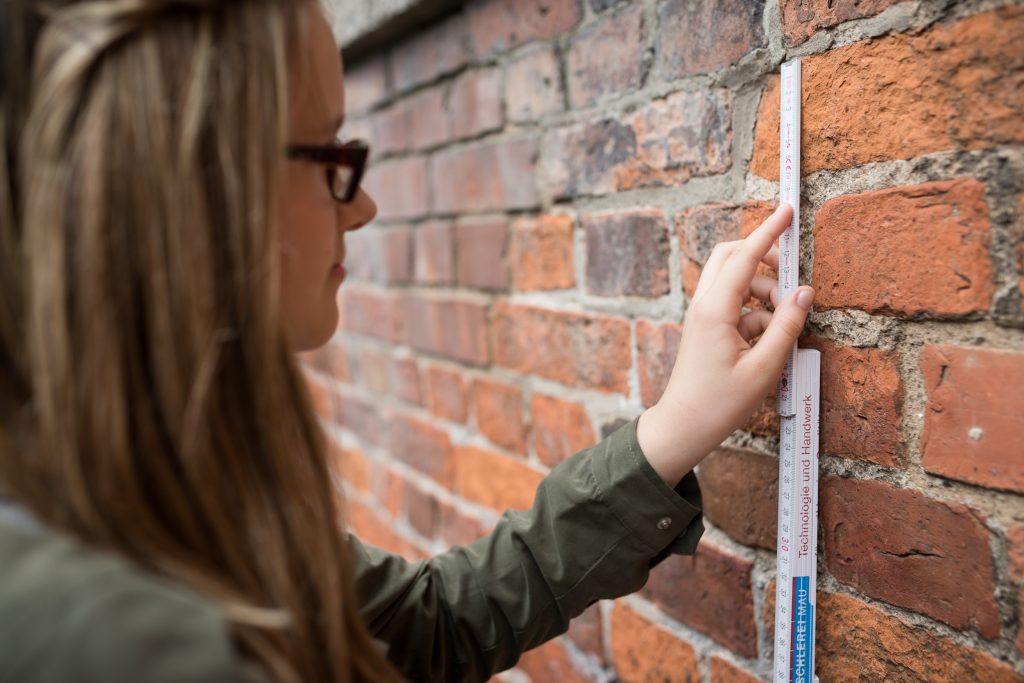
Discuss with your learners which small groups will test which tasks. Your learners will then go outside again with their measuring tools.

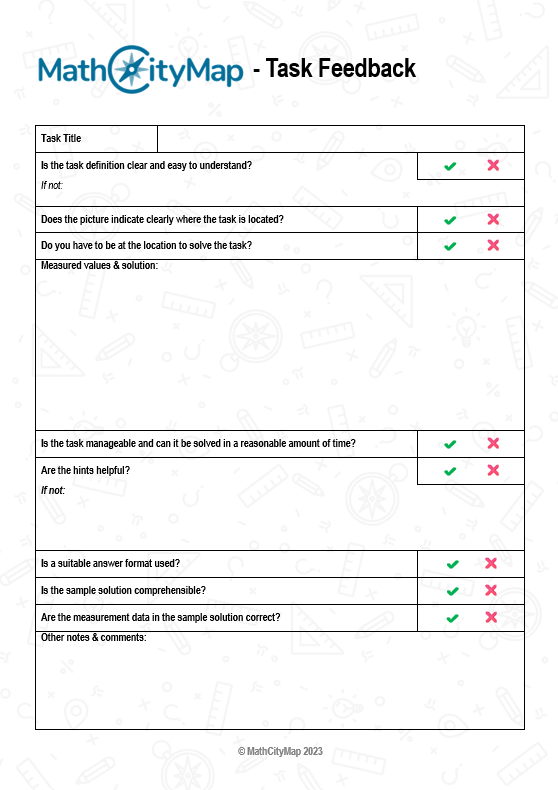
In addition, they are supported by the Peer Review worksheet (see materials page) in the form of a checklist to give appropriate feedback.

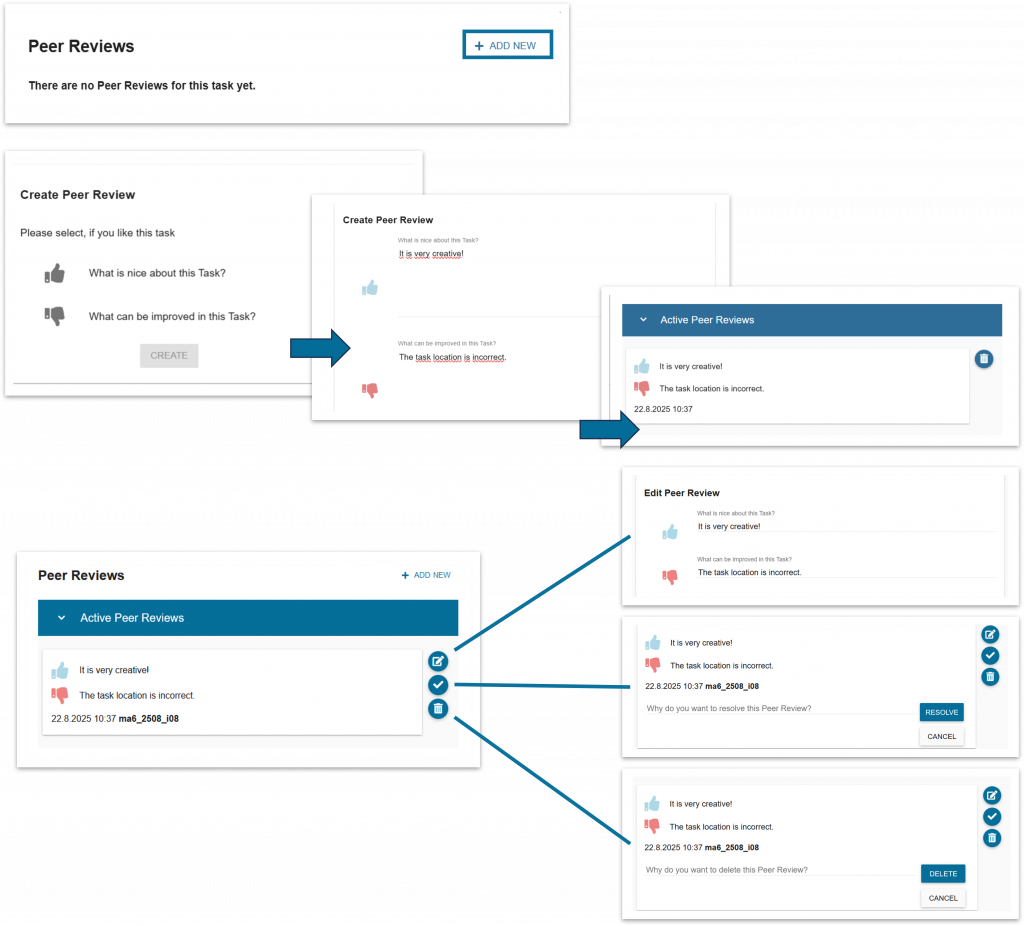
Step 3 – Write comments and incorporate feedback

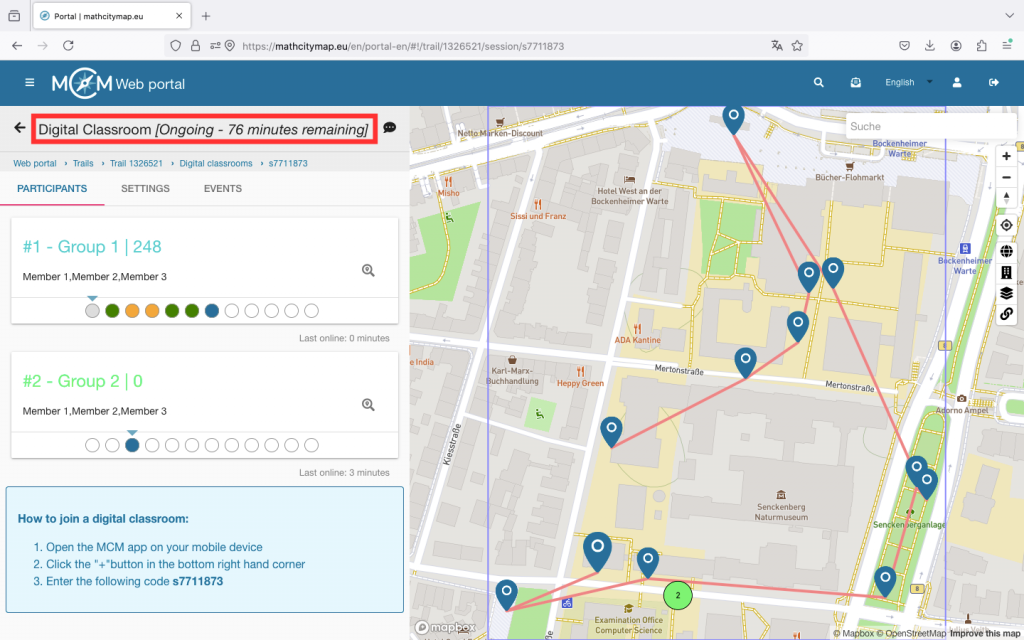
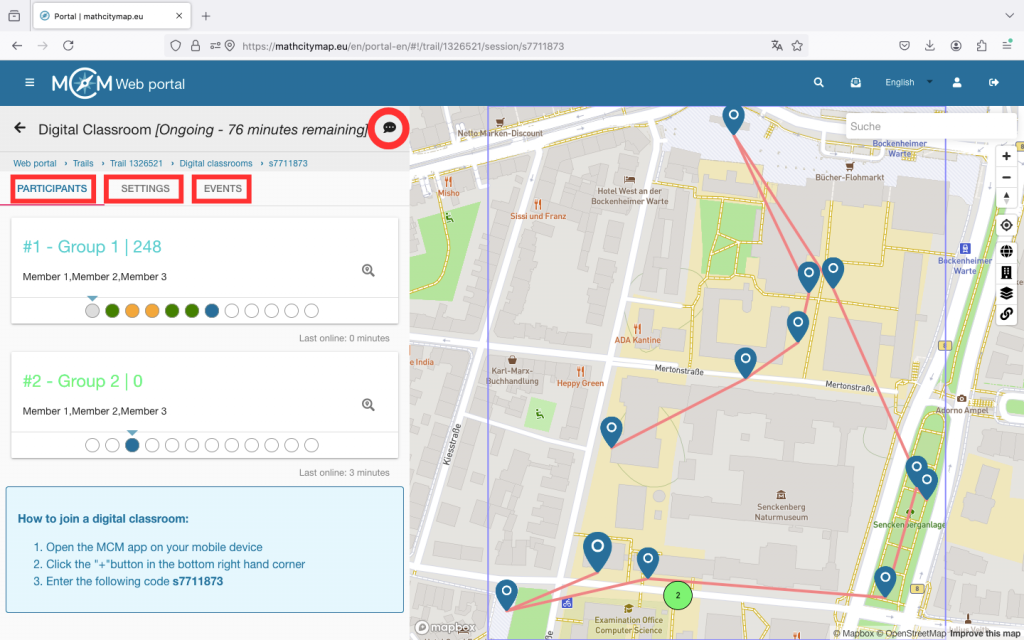
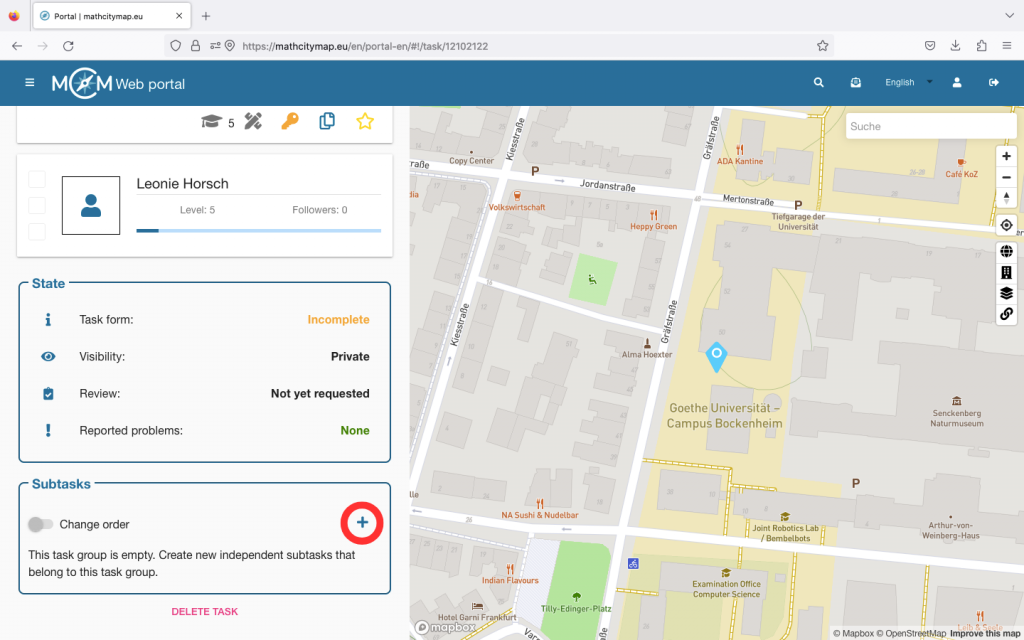
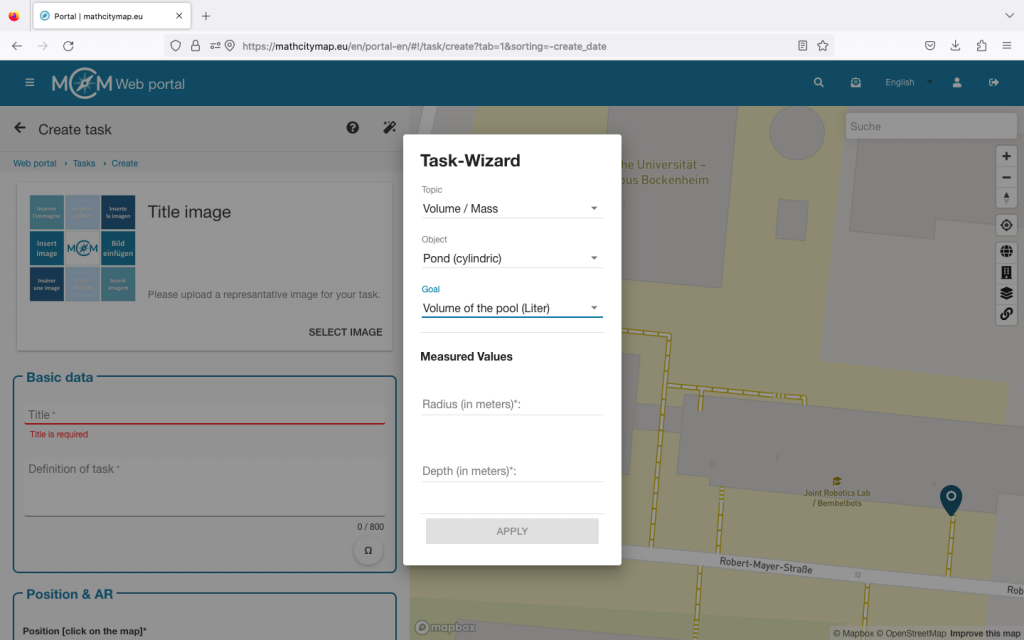
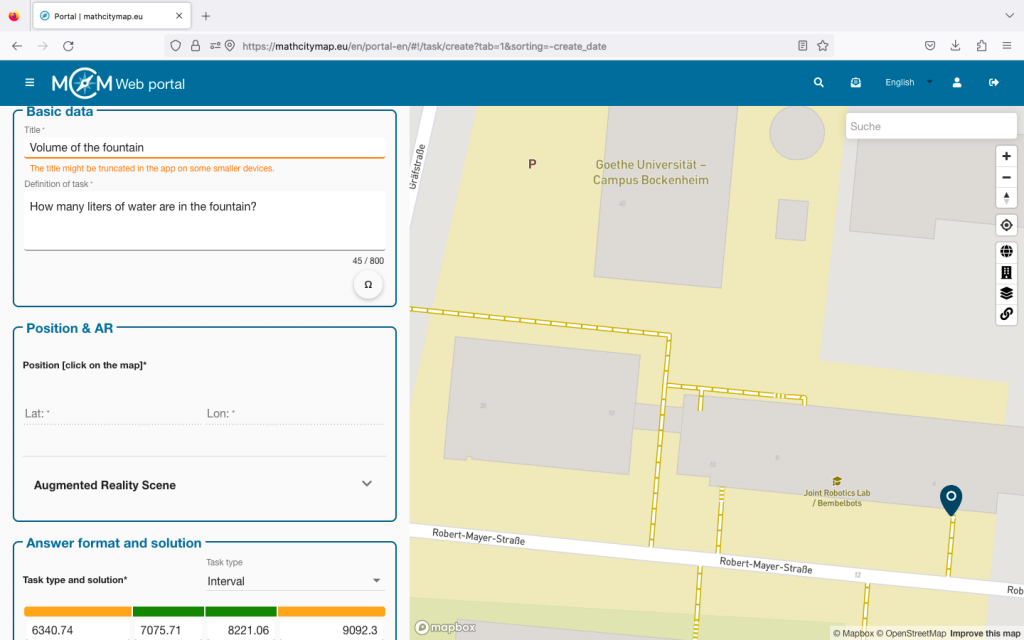
Once the tasks have been tested, the learners enter their feedback in the web portal.

You can also see your learners’ comments and intervene if necessary.

Then give your learners time to incorporate the class feedback and revise the tasks.

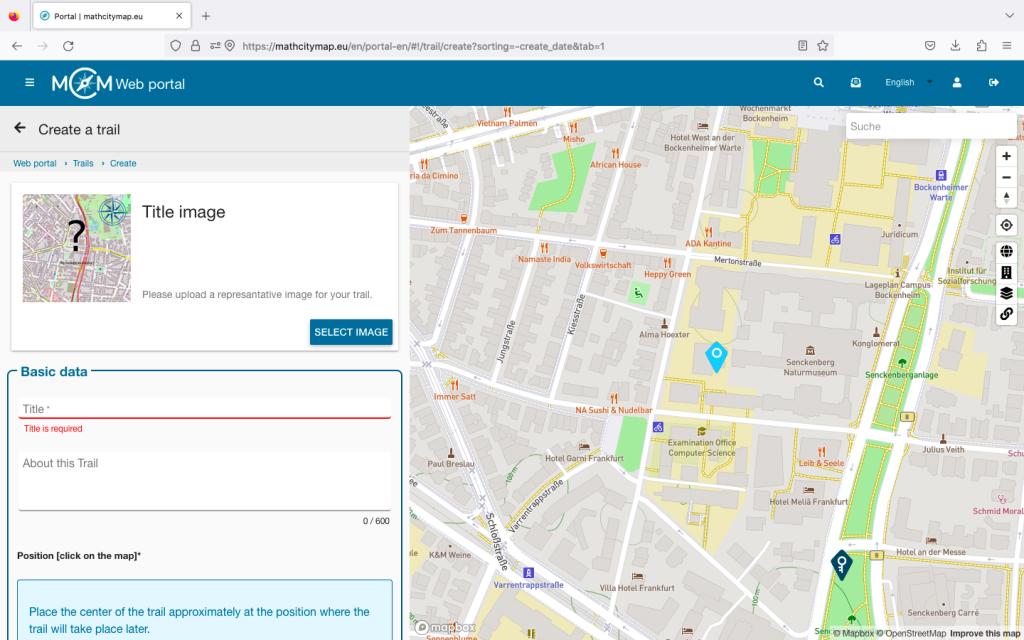
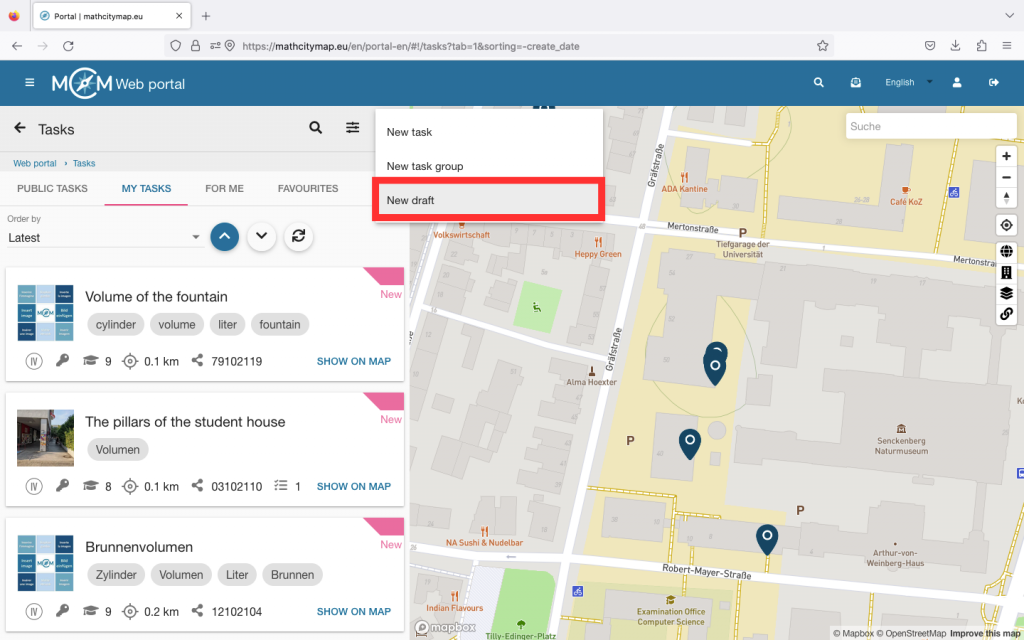
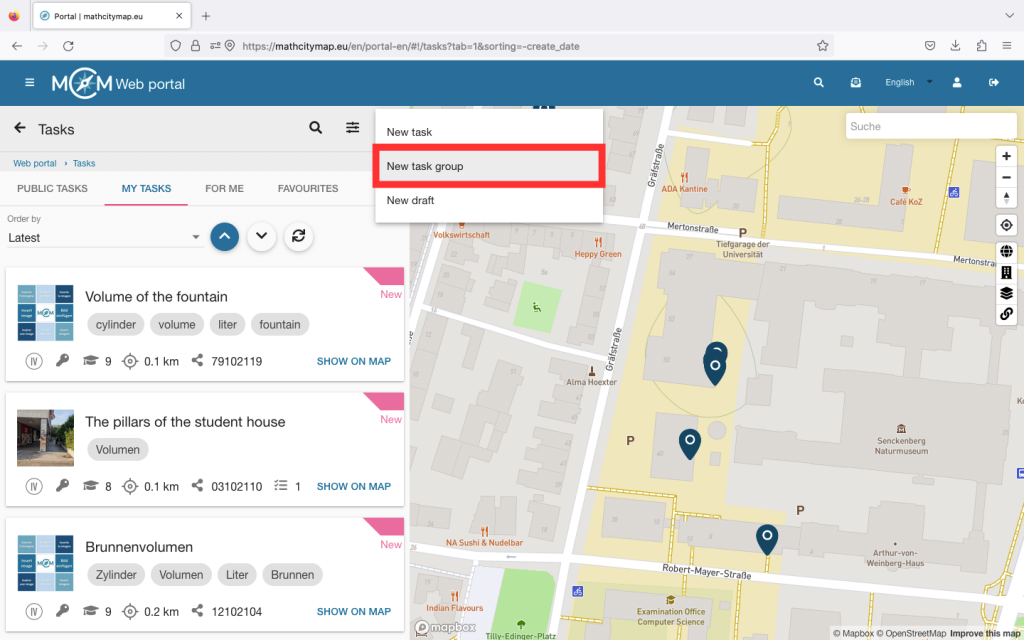
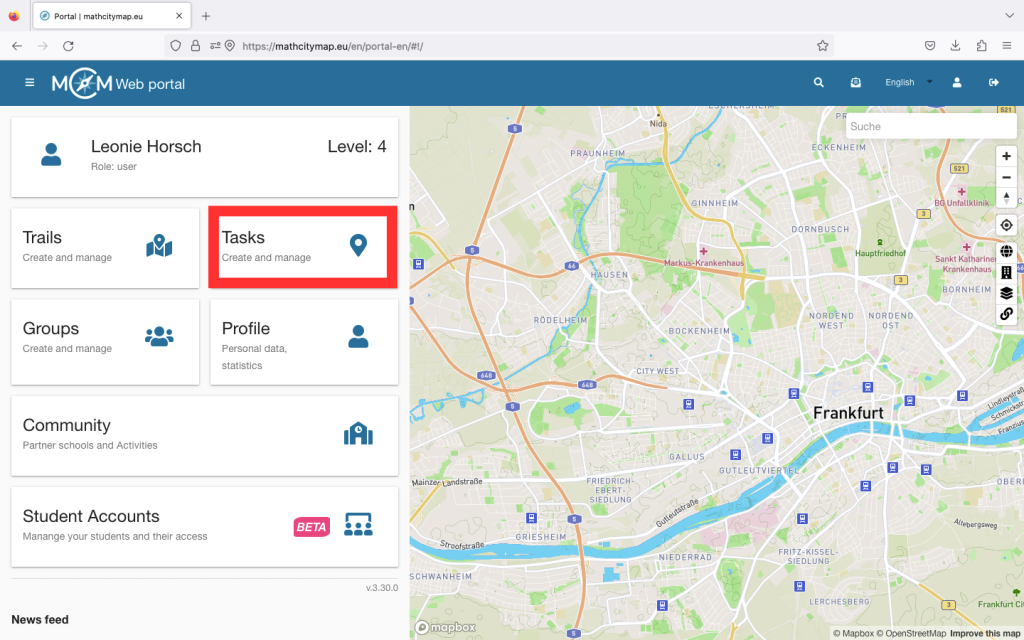
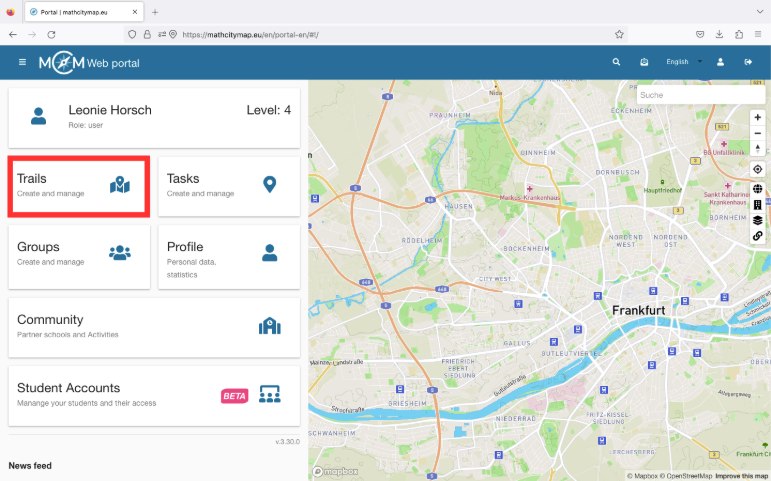
Step 4 – Create the trail

Once everyone has completed this process, you can compile a trail from your learners’ tasks.

This works via the normal trail field.

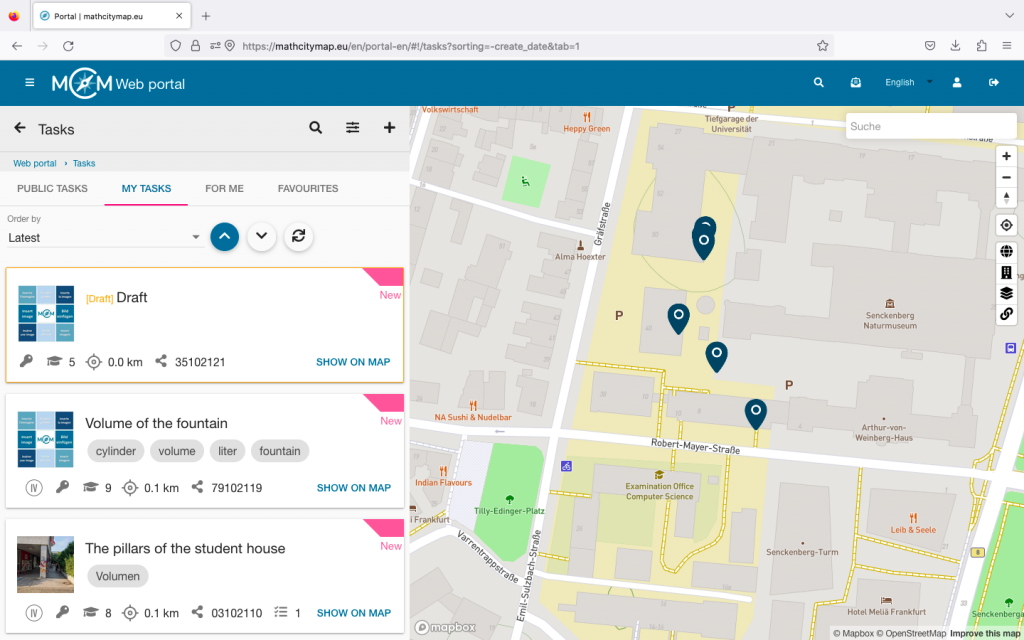
Student tasks are always displayed as pink pins.

Further Instructions

Create tasks with the student accounts

With MathCityMap student accounts, you can let your students create their own outdoor tasks. In addition to the classic math trail, this offers a unique opportunity to explore mathematical concepts. Here you’ll find step-by-step instructions describing how to find and create tasks on the portal.

Note: In the MATRIX project, we have created a self-study course for your students that guides them through some of the steps listed here. Your students will find this course as soon as they log into the portal with a student account. It includes instructions on creating assignments and using the web portal, and you can assign it as homework in advance if needed.

Step 1 – Search for task ideas

Once all the organizational details are sorted out, you can divide your class into teams of three and equip each team with measuring tools. Also, give them enough copies of the worksheet for completing the task (see materials page).

Take your class outside to the location where the tasks will be created. Give your students enough time to search for task ideas and document them using the worksheet.

Provide them with assistance if they don’t have their own ideas, and give feedback on their ideas.

Step 2 – Complete task ideas

Once each small group has gathered task ideas, you go back to the classroom.

The students first fill out the worksheet for creating tasks inside (see material page), i.e. they complete their task ideas with hints and a sample solution.

Step 3 – Create tasks in the portal

Next, you give the students an introduction to using the web portal, specifically how to create an assignment with their student accounts. This works exactly the same way as with regular accounts.

In the next step, you give each student the login details for a student account you previously created. You can learn how to create these accounts in the tutorials “Creating Learning Groups” and “Managing Learning Groups”.

Now have your learners create the tasks in the web portal.

Further Instructions

Preparing lessons with student accounts

With MathCityMap’s student accounts, you can let your pupils create their own outdoor activities. As well as the traditional way of completing a Mathtrail, this offers a unique opportunity to look at things through a mathematical lens. Here you’ll find step-by-step instructions to help you prepare your pupils for this.

Step 1 – Discover a MathCityMap trail

Before the planned lesson on creating tasks, you should familiarize your students with the idea of ​​MathCityMap.

Have them walk a math trail and collect their impressions of the tasks.

Step 2 – Changing perspectives and organizational issues

Then change perspective with them: Discuss the idea of ​​creating individual tasks and a joint math trail as a class product.

Further clarify what your students’ objectives will be in the tasks: Should the tasks be modeling tasks, for example? Is the math trail intended for a specific target group, such as younger students? Or is it to be created for a special event, such as the upcoming school festival? How many tasks should be created?

It is advisable to clarify these questions beforehand in order to agree on the type of tasks, topics, and target group. You may also want to provide your learners with guidance on creating tasks.

Further Instructions

Manage Digital Classroom

The digital classroom offers many possibilities. Here you will learn how to observe, manage, and support your digital classroom live during, before or after the math trail.

Step 1 – Switch to the observation view

Open the trail for which you have created your digital classroom and click on the corresponding icon.

Depending on when you want to open the digital classroom view, you will find your digital classroom under “Ongoing,” “Upcoming,” or “Completed.”

Click on the desired digital classroom to open the observation view.

Step 2 – Overview in the “Ongoing” observation view

At the top of the view, you can see how many minutes are left, meaning when the digital classroom will automatically end.

The view shows a list of all joined groups with names, status, and points on the left side. The number after the hashtag indicates the order in which the groups joined. The group with the most points is always at the top of the list.

For each group, you can see round fields that represent the different tasks. A white field means the task has not yet been viewed. Blue means the task has just been opened. Red, yellow, and green stand for incorrectly, satisfactorily, or well-solved tasks. A grey field means that this group has skipped the task.

If you click on a group, you will access the chat. Here, you can communicate with the participants via message, voice note, or pictures throughout the session. Under “Events,” you can see how the learners proceed — for example, whether they use hints and whether they need multiple attempts to solve a task.

On the right side of the view, there is a map showing the tasks and the joined groups (provided they activate GPS). Through numbering and colour coding, the groups on the map can be easily found again in the list.

Step 3 – Additional functions in “Ongoing”

At the top right, there is a chat icon. By clicking on it, you can send a message to all participants at once. Use this, for example, for time-related hints.

Under “Settings,” you can, for instance, extend the session duration or adjust your view. You will also find some information about your digital classroom there.

Under “Events,” you can see all the actions of the joined groups. For a more compact view, select individual groups and then go to “Events.”

To remove members, click on the corresponding group and then click on the X in the top right. Confirm the action with “OK.”

Step 4 – Manage upcoming digital classrooms

Up to 30 minutes before the start of the session, you can adjust the settings of your digital classroom.

The same settings can be edited as when creating the digital classroom.

During the session and in the 30 minutes beforehand, editing is no longer possible.

Step 5 – Manage completed digital classrooms

Up to 6 months after the session, the collected data of the digital classroom can still be viewed.

For example, you can gain insights into which tasks were easy for the learners and which may have caused problems more frequently. These can be discussed again during a joint review session.

Weitere Anleitungen

Draft and Task Group

In the MathCityMap web portal, you can prepare tasks in draft mode before you finish creating the task. You can also bundle tasks that are all related to the same object into task groups. Here is a step-by-step guide on how to create drafts and task groups:

Step 1 – Create a new task

Go to “Tasks – Create and manage” or select “Tasks” in the menu bar on the left-hand side.

Then click on the plus symbol at the top right and select “New draft”.

You will then be asked to enter basic data for your task.

Click on “Create” to save your draft. 

Step 2 – Edit drafts

Like all other tasks, you can find drafts in your profile under “My tasks”. All drafts are framed with a yellow box.

If you want to complete the task, you can simply click on it and edit the task.

Once you have entered the missing information, click on “Save”.

Step 3 – Create task groups

Go to “Tasks – Create and manage” or select “Tasks” in the menu bar on the left-hand side.

Then click on the plus symbol at the top right and select “New task group”.

You will then be asked to create the first task in your task group.

Once you have entered all the information, click on “Create” at the bottom.

Step 4 – Add subtasks

To complete your task group, you need to create additional subtasks.

If you click on your task group and scroll to the bottom, you will be taken to the “Subtasks” section. Click on the plus symbol to add further subtasks to your task group.

The page for creating a task opens again. Click on “Create” to save the subtask.

Finally, you can change the order of the subtasks. To do this, click on the “Change order” button and move the subtasks so that they are in the right place.

Then confirm that you want to save the changes.

Further tutorials

Support Tasks

Support tasks are additional tasks designed to help learners better understand more complex tasks or calculate intermediate steps. These tasks can facilitate the learning process by focusing on and supporting partial aspects of a main task. Here is a step-by-step guide to creating and using support tasks:

Step 1 – Open task area

Go to “Tasks – Create and manage” and under “My tasks” select the task for which you would like to create support tasks.

This task then becomes the main task and can be subdivided by one or more support tasks.

Click on the desired task and then scroll to the bottom.

Step 2 – Create a support task

You will see a box with the title “Support tasks”. Click on the plus symbol on the right-hand side to create a new support task.

You will then be asked to enter all the basic information again, as when creating the main task.

You only do not need to enter the location, as this is the same as the one of the main task.

Once you have entered all the information, click on “Create”.

Step 3 – Multiple support tasks

For complex tasks, it can be helpful to create several support tasks. To do this, click on the plus symbol again and create another support task.

You can then determine the order in which the tasks should be processed. To do this, click on the “Change the order” button and move the support tasks so that they are in the right place.

Then confirm that you want to save the changes.

Further Tutorials

Create a Digital Classroom

In the MathCityMap web portal, a digital classroom can be set up for a math trail, offering organizational and educational tools. Here you will find a step-by-step guide to creating a digital classroom:

Step 1 – Select an Existing Trail

To select an existing trail, click on the “Trails – Create and Manage” field. You can also click on “Trails” in the menu bar on the left.

A view with your trails will open. Click on the desired trail to open its detailed view.

You can also create a digital classroom with public trails. Click on the desired trail to open its detailed view.

Step 2 – Switch to the “Digital Classroom” area

In the top left, you will see an icon showing a figure in front of a blackboard. Click on it to open the digital classroom section.

Here, you’ll see an overview of already created classrooms (if any), as well as a “New” button to create a new digital classroom.

Step 3 – Create a new digital classroom

After clicking “New,” the digital classroom editor will open.

First, fill out the general information: The name of the digital classroom will be displayed to the learners in the app, select the date and time for the session (learners can join 30 minutes before the start), and set the duration of the digital classroom (after the time has expired, the session will end for all participants).

You can also write a welcome and farewell message. These will be shown to all participants at the beginning and end or when leaving the session.

In the settings, you can enable or disable the leaderboard. The leaderboard is a local ranking list and shows your team’s score, as well as the score of the team ahead and the team behind.

With the automatic task assignment feature, you can control whether all participants should start with the same task or whether they should first spread out among the tasks.

Click on “Create” to save the settings. The digital classroom will then appear under “Ongoing” or “Upcoming” depending on the start time. In the square brackets, you’ll find the associated code starting with an “s.” Share it with your learners so they can join the digital classroom.

Weitere Anleitungen

Conducting Lessons with MCM

MathCityMap is a great way to make math lessons interactive and hands-on by having learners solve math problems outdoors. Here are a few steps on how to conduct your lessons with MCM:

Step 1 – Preparation

Before the planned lesson, you should look for suitable tasks or, if necessary, create your own tasks. Think about what content you want to work on or deepen and then search for suitable tasks in the web portal using the filter functions.

Also pay attention to the location of the tasks. It should be easy to reach with the class.

Then create a trail to summarize the tasks. You can also create a digital classroom, share the trail with the learners there and monitor their progress.

If necessary, you should also organize a range of materials beforehand, such as a folding ruler, measuring tape or calculator. When carrying out the trail, learners can also take a piece of paper and pencil with them to write down their calculations.

Step 2 – Preparation in the classroom

The trail is intended to take up and deepen the content of the lesson, so it may be useful to discuss the various mathematical concepts again.

For the implementation, you can either download the trail and its tasks as a pdf and print it out for the learners or use the MathCityMap app.

It is best for learners to work in small groups of around three people.

Only one mobile device per group is needed when working with the app.

Briefly explain how to use the app and discuss how much time the learners have for the trail and where they should meet at the end of the time.

The trail you have created has a code so that you can share it specifically with your learning group. This can be found in the information about your trail. Share it with the learners so that they can download the trail. This means they don’t even need internet access when they are outside.

Step 3 – Go outside and solve tasks

Take your class outside to the place where the tasks have been placed. The learners navigate to the individual tasks using the MCM app or the printed map.

It is best for the individual groups to start at different tasks so that they do not get in each other’s way.

On site, the learners take measurements and work on the questions.

Depending on the teacher’s settings, they can receive direct feedback on the accuracy of their solution in the app.

Step 4 – Follow-up in the classroom

After the outdoor phase, you can discuss the learners’ experiences together in the classroom. You can talk about specific tasks and solutions, as well as different strategies.

It is best to use MathCityMap not only for one outdoor math lesson, but to integrate it regularly into your lessons. Over the course of the school year, learners can always solve new tasks and, if possible, create tasks themselves.

Further Tutorials

Finding tasks outside

To find suitable mathematical tasks outside, you should look for certain objects in your environment that are well suited for mathematical questions. Here are some steps you can follow when looking for suitable objects and questions:

Step 1 – Recognize suitable objects

Look for objects with clear geometric shapes or fixed dimensions, such as rectangular buildings, round fountains or linear paths.

You can also use natural features such as trees, plants or hills.

Road signs, distance markers or other markings in the environment also often provide valuable data for mathematical questions.

Schritt 2 – Fragestellung

Make sure that your question also requires an activity. In order to solve the task, you have to estimate, observe or measure and also calculate.

You should therefore not choose objects where you can already read off the solution.

Further Tutorials

Task-Wizard

The task-wizard is a helpful tool to make the creation of tasks in the MathCityMap web portal easier and faster. It works for some of the standard tasks. Before using it, you must have already thought about the task and collected measured values. Here is a step-by-step guide on how to use the task-wizard:

Step 1 – Open the task-wizard

When you create a task, you will see a magic wand icon in the top right-hand corner. Click on this to open the task-wizard function.

Step 2 – Enter basic data

First select a suitable topic for your task.

You can then select an object that matches the topic.

Then you need to specify what you are looking for in your task.

Fields will then open in which you should enter your measured values.

Once you have entered everything, click on “Apply”.

Step 3 – Check and complete the data

The task-wizard automatically formulates a suitable task and also creates the sample solution and appropriate hints.

Think about whether you want to adjust the title and add a cover image.

Click on the position on the map where your object is located and click on “Create” at the end.

Further Tutorials