Profile

Your profile in the MathCityMap web portal contains personal data and statistics on your activities in the portal. Other MCM users can find out which tasks you have published, for example. Here is a more detailed description of how you can use your profile.

Step 1 – Open Profile

To open your profile, click on the “Profile – Personal data, statistics” field on the start page. You can also select this from the menu bar on the left.

You will then see your name, your profile picture and your timeline.  

Step 2 – Edit Profile

If you want to edit your profile, click on the pencil icon in the top right-hand corner.

Here you can add a profile picture or specify your occupation and add awards.

Click on “Save changes” to save your settings.  

Step 3 – Activities in the Portal

In your timeline, you can see your activities in the portal in chronological order. The most recent activity is always displayed at the top.

In addition to your timeline, you can also view your public tasks and trails separately. This can be a helpful view when searching or sharing.

You can also see who you have subscribed to and your subscribers. If you follow someone, you will be informed about their activities in your newsfeed and vice versa.  

Step 4 – Awards

You can earn various awards by participating in the web portal. You will find all possible awards and those you have already achieved under the medal symbol.

As soon as you have received one or more awards, you can also add them directly to your profile so that they appear next to your profile picture. To do this, click on the pencil icon.

You can select up to three awards and decide whether they should be in first, second or third position.

Finally, confirm by clicking on “Save changes”. 

Step 5 – Profiles of other Members

All public tasks and trails are always accompanied by the name of the person who created them. By clicking on the person’s name, you will be taken to the corresponding profile.

This is basically structured like your own, but you will find additional icons at the top right.

You can follow and unfollow a person by clicking on the bell icon.

If you want to request a person’s contact details, you need to click on the business card symbol. The other person must first agree to the transfer, so it may take some time before you receive it.

You can also leave a public message on the person’s timeline. To do this, click on the paper airplane icon and enter your message.  

Weitere Anleitungen

Groups and Sharing Content

You can join groups or create your own groups and share your content in them, making tasks and trails available to other members. Here is a step-by-step guide on how to create groups, join them and share content:

Step 1 – Open group area

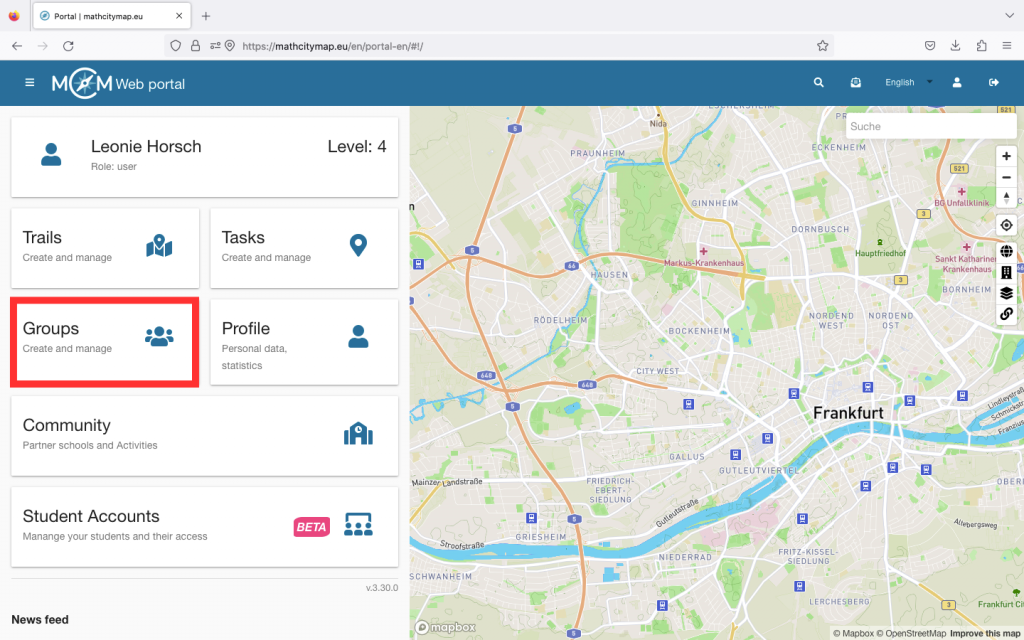
Click on the “Groups – Create and manage” field on the start page of the web portal or select “Groups” in the menu bar at the top left.

You will then be shown the groups that you have already joined.

Step 2 – Searching your groups

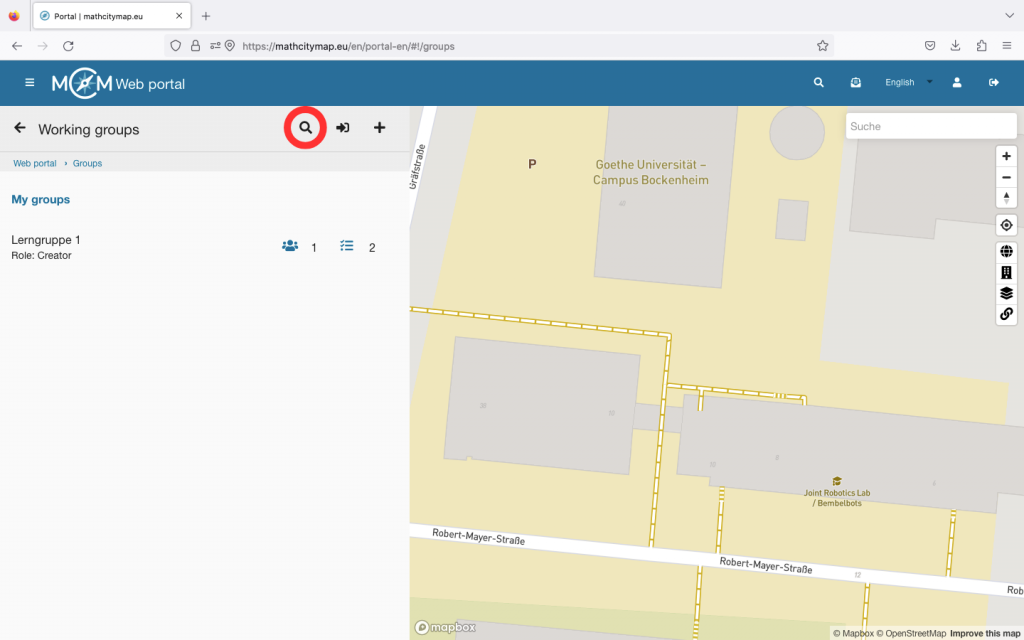
If you have already joined several groups and are looking for a specific one, it may be helpful to click on the magnifying glass symbol.

There you can search for the title and the matching groups will be displayed at the top.

Step 3 – Joining a group

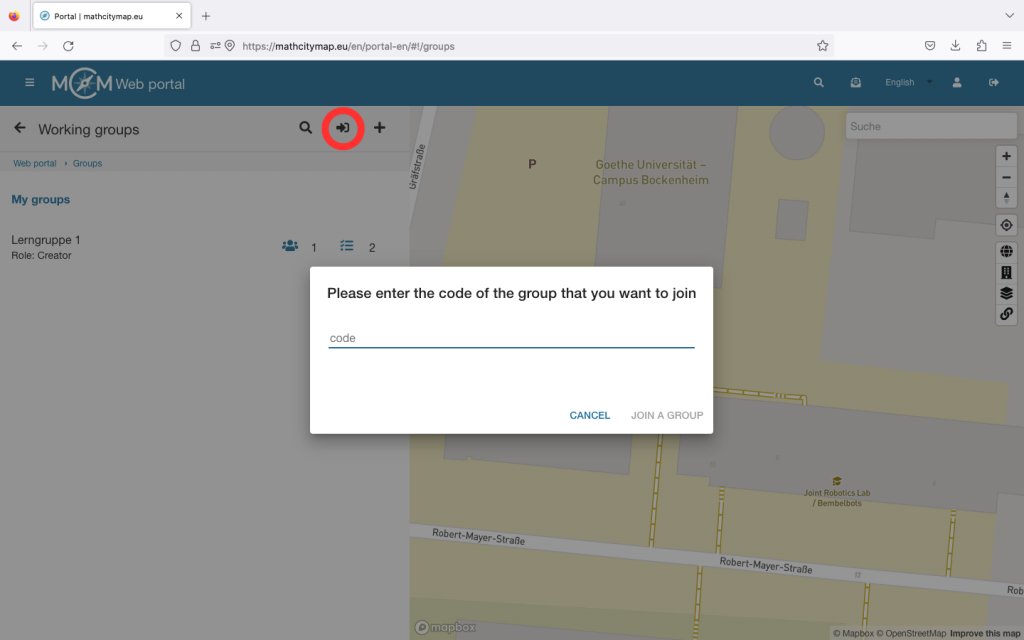
To join an existing group, you will need the corresponding code. The person who created the group can share it with you.

You can enter it by clicking on the join symbol in the top right-hand corner.

Then click on “Join a group”.

Step 4 – Create a group

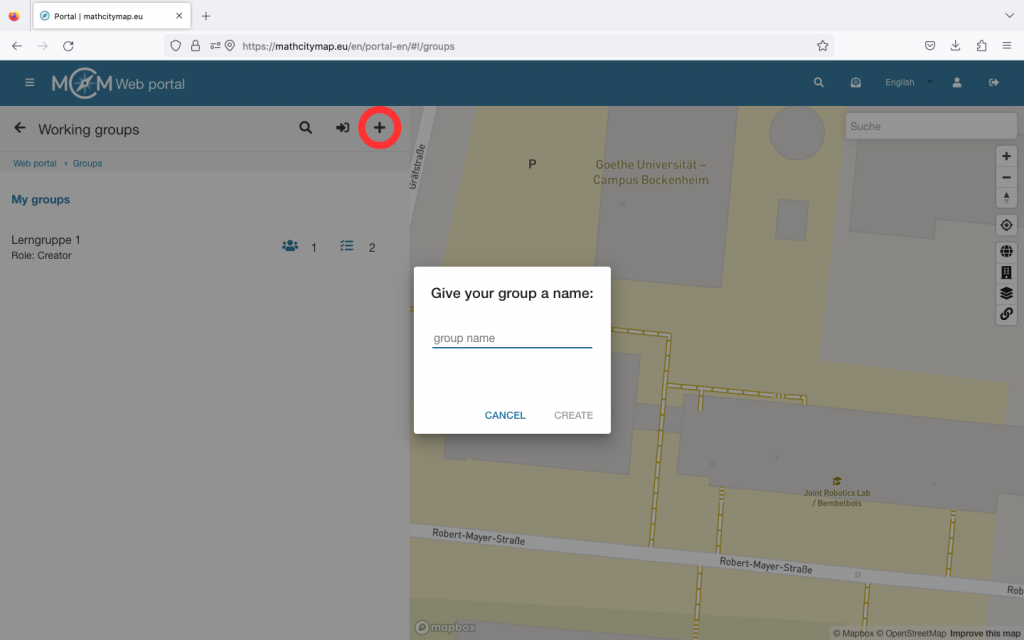
Click on the plus symbol to create a new group.

You will then be asked to enter a group name.

Click on “Create” or confirm with Enter.

Step 5 – Manage group

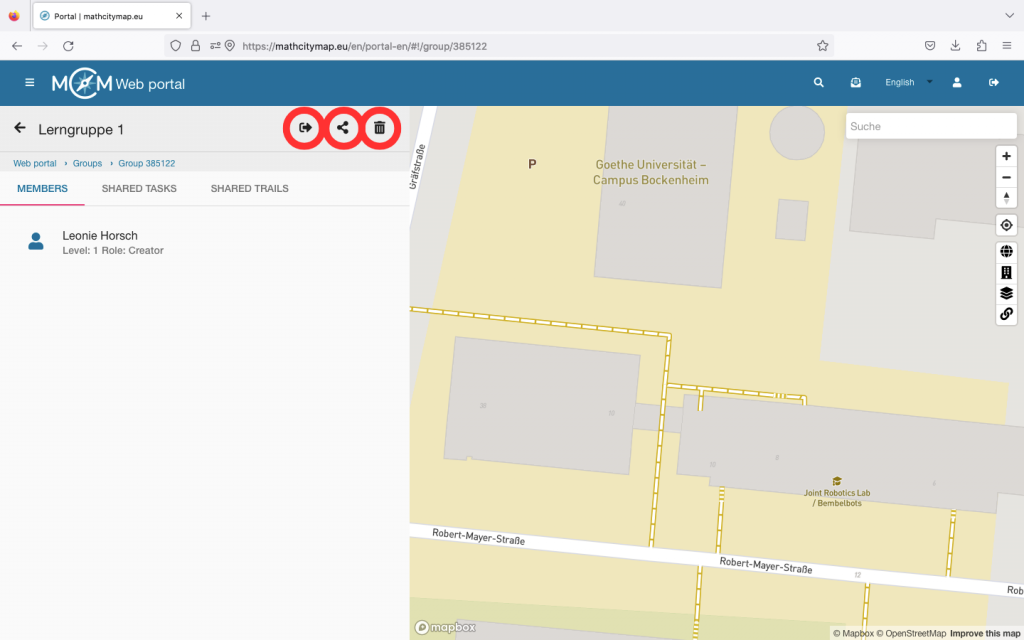
If you click on the share icon, you will be shown the access code for your group. You can share this with other people so that they can join your group.

You can also delete your group by clicking on the trash can icon.

You can leave the group by clicking on the leave icon.  

Step 6 – Share content

When you click on a group, you will see the members, the shared tasks and the shared trails.

To share content yourself, you must first create your own tasks or trails.

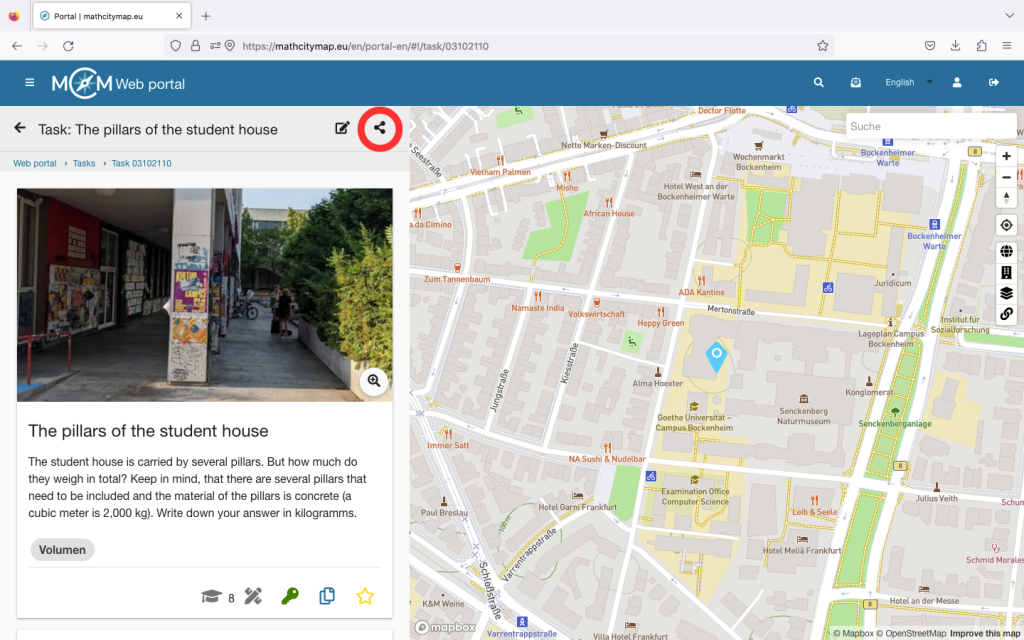
You will then find the share icon at the top right of your tasks. If you click on this, you can select the group in which you would like to share the content.

Click on “Save” to share the content in the selected group.

Further Tutorials