Webportal in the App

The MathCityMap web portal can also be used directly via the app. This allows you to access and manage created content such as tasks and trails. Here is a step-by-step guide to accessing and using the web portal in the app:

Step 1 – Open the Webportal

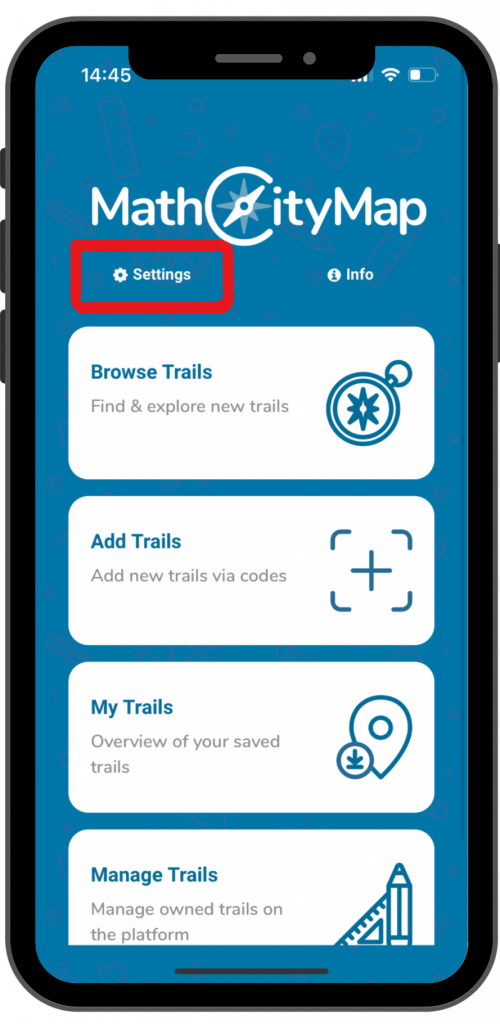
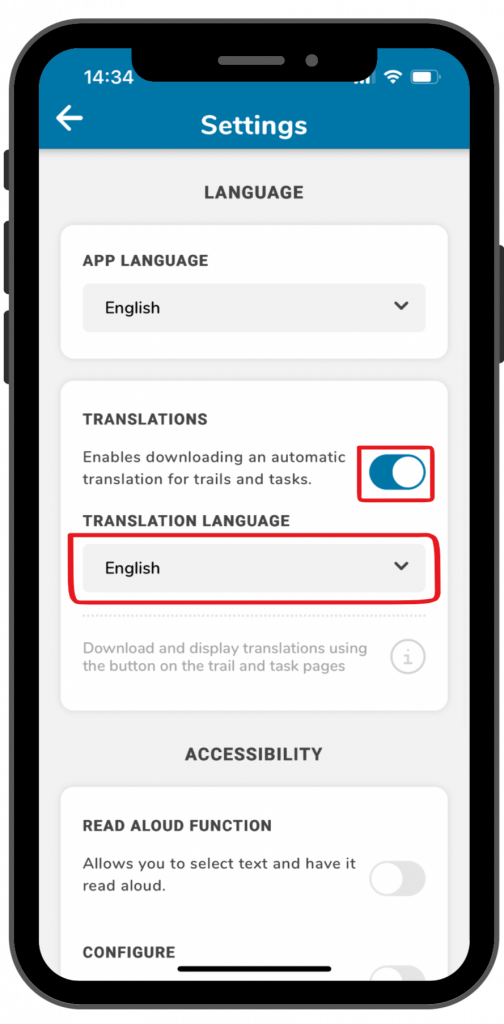
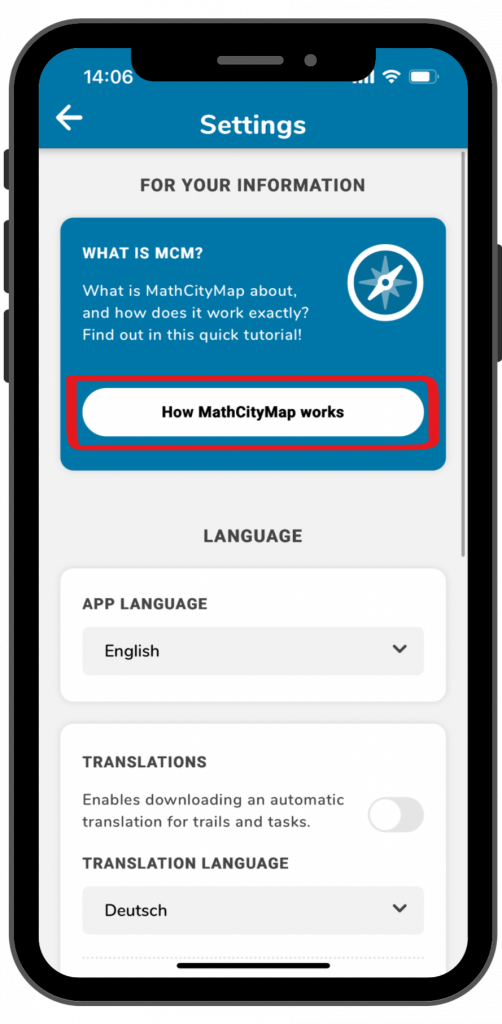
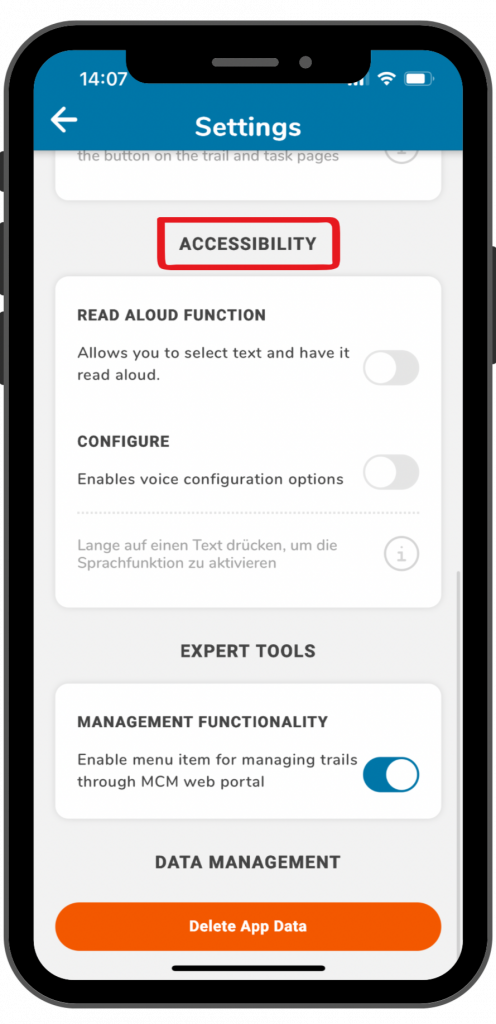
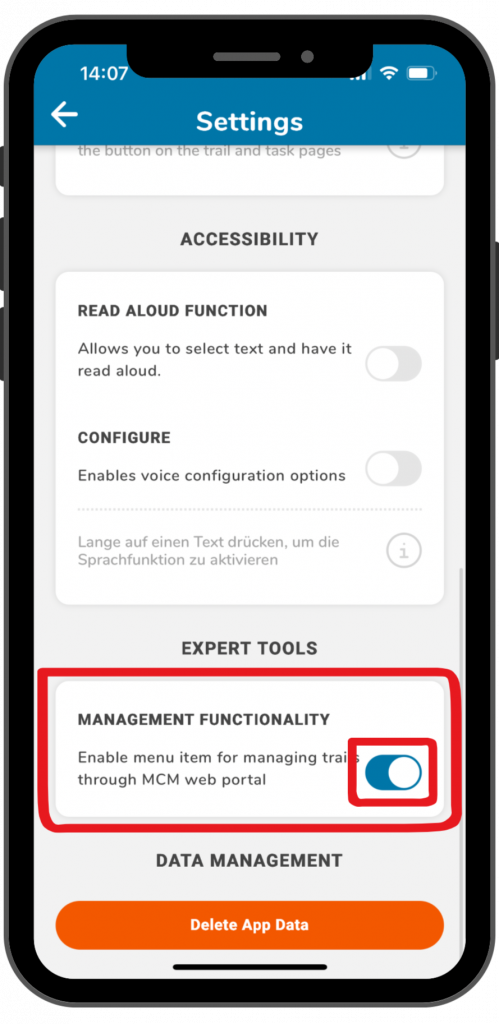
To be able to use the web portal in the app, you must first activate the management option in the settings.

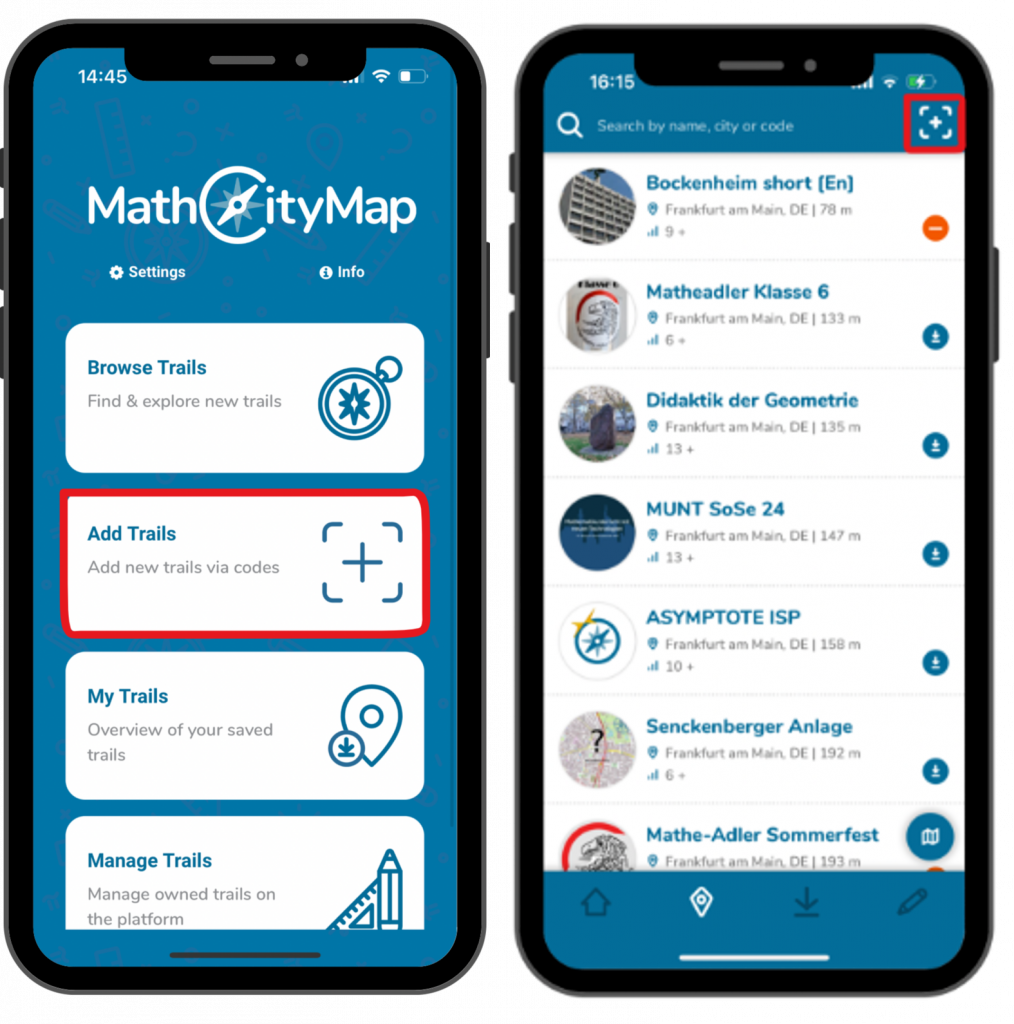
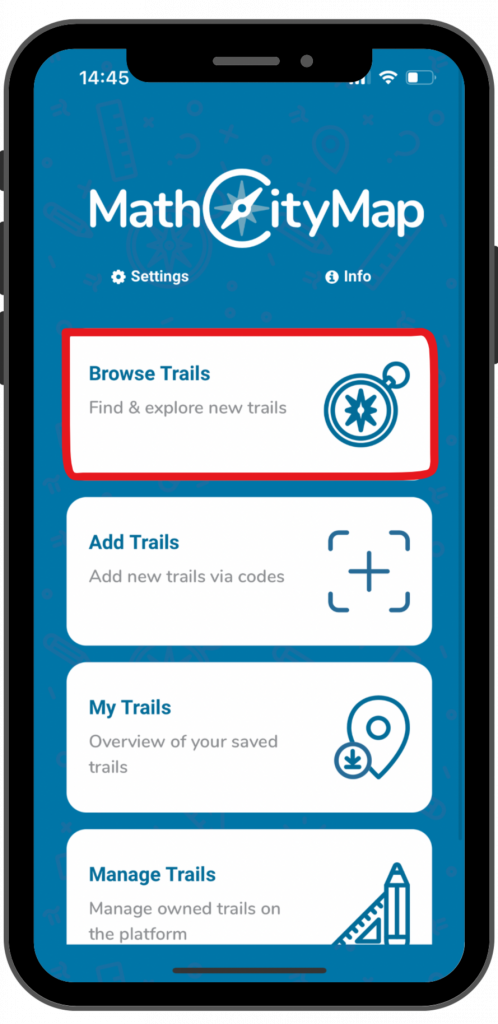
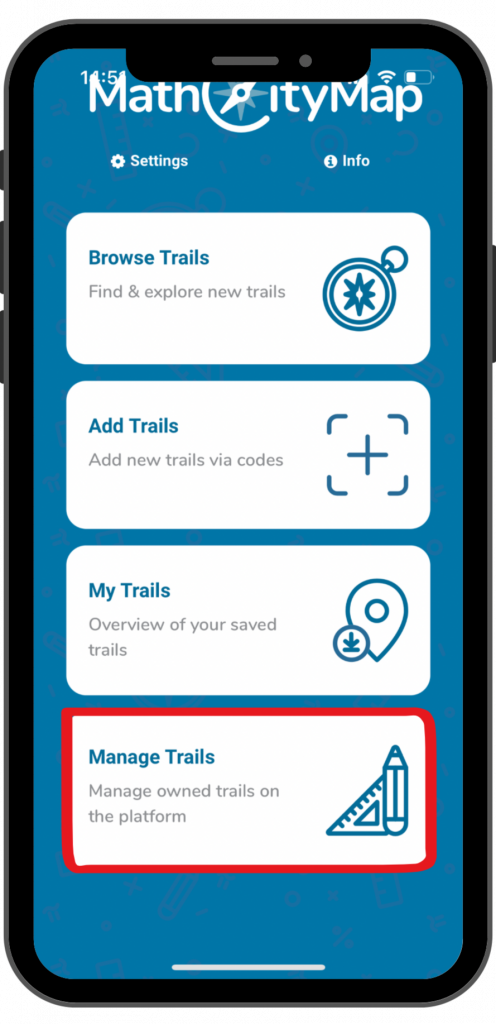
Then you can click on the “Manage trails” field on the start page. The web portal and a login window will open.  

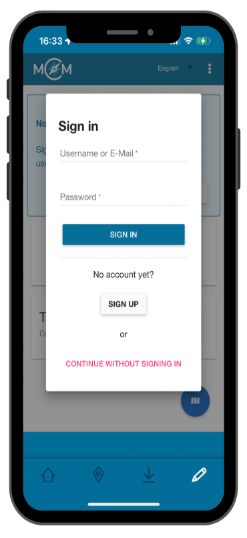
Step 2 – Log in to the Webportal

If you already have an account in the MathCityMap web portal, you can sign in directly.

Otherwise, you can register.

You can also continue without logging in, but then you will not be able to use all the functions of the portal. 

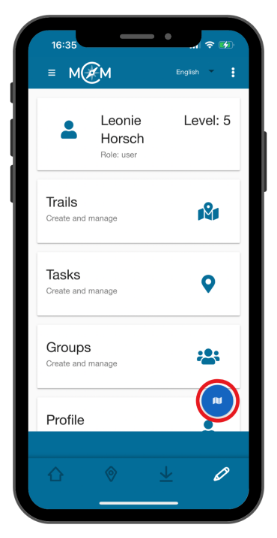
Step 3 – Functions of the Webportal

 
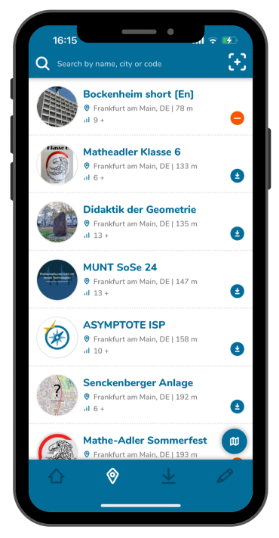
You can use the web portal via the app in the same way as you do via the browser. Only the view is slightly different when using the smartphone.

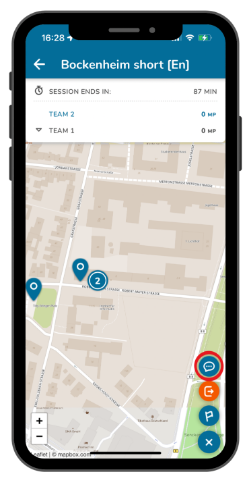
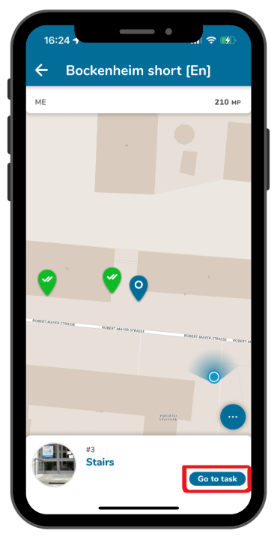
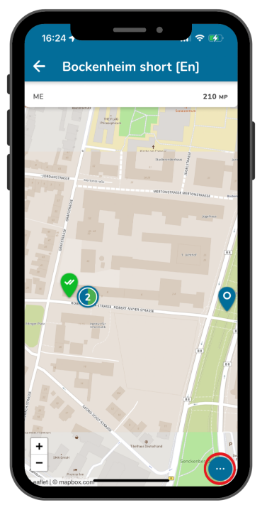
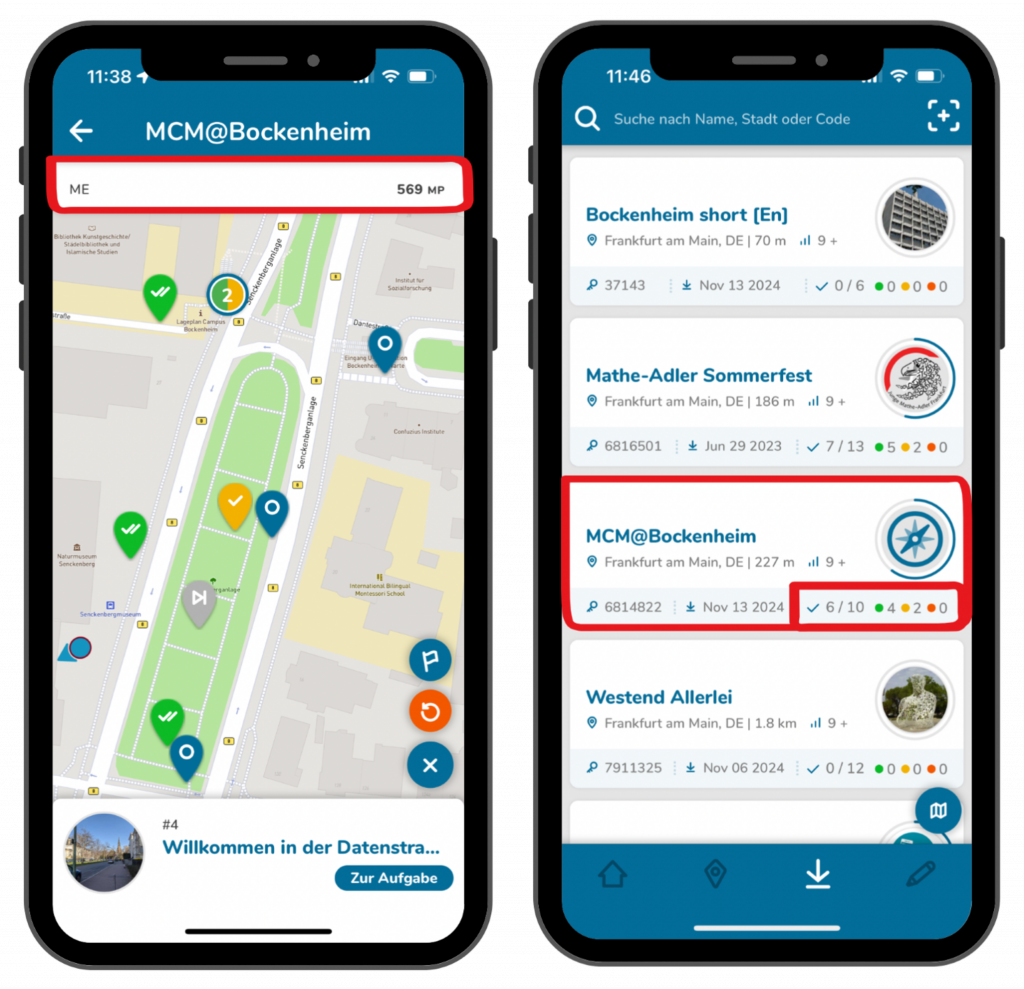
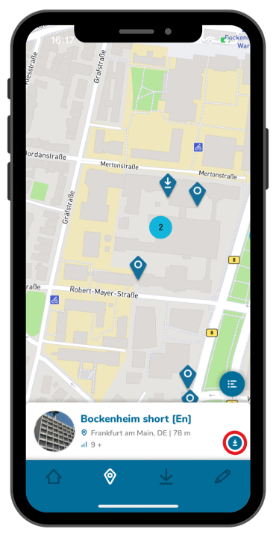
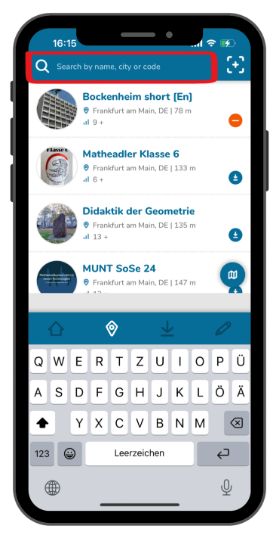
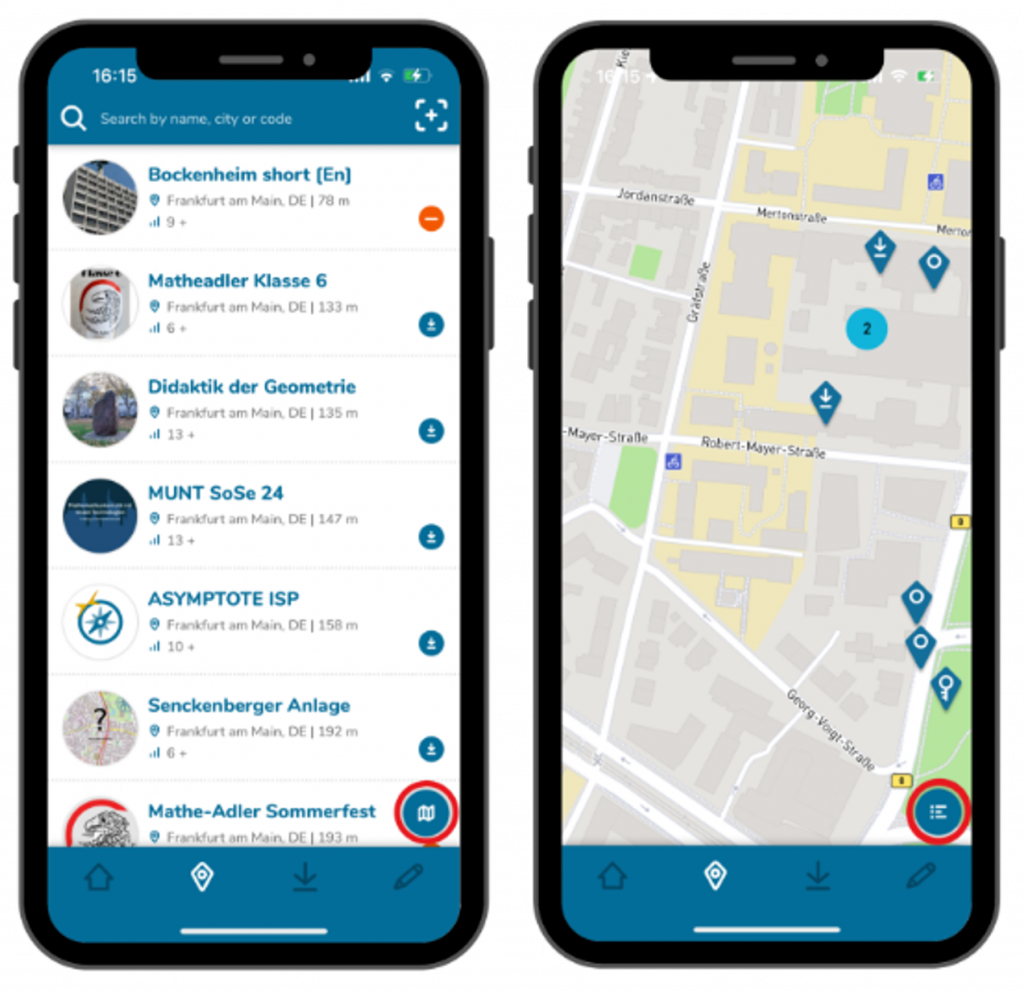
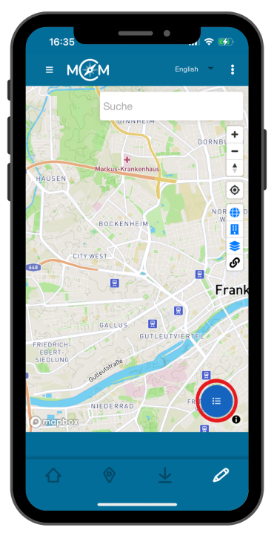
Here you will find the menu fields in list form and can switch to the map view by clicking on the map symbol at the bottom right.

You can also switch back to the menu view by clicking on the list icon.  

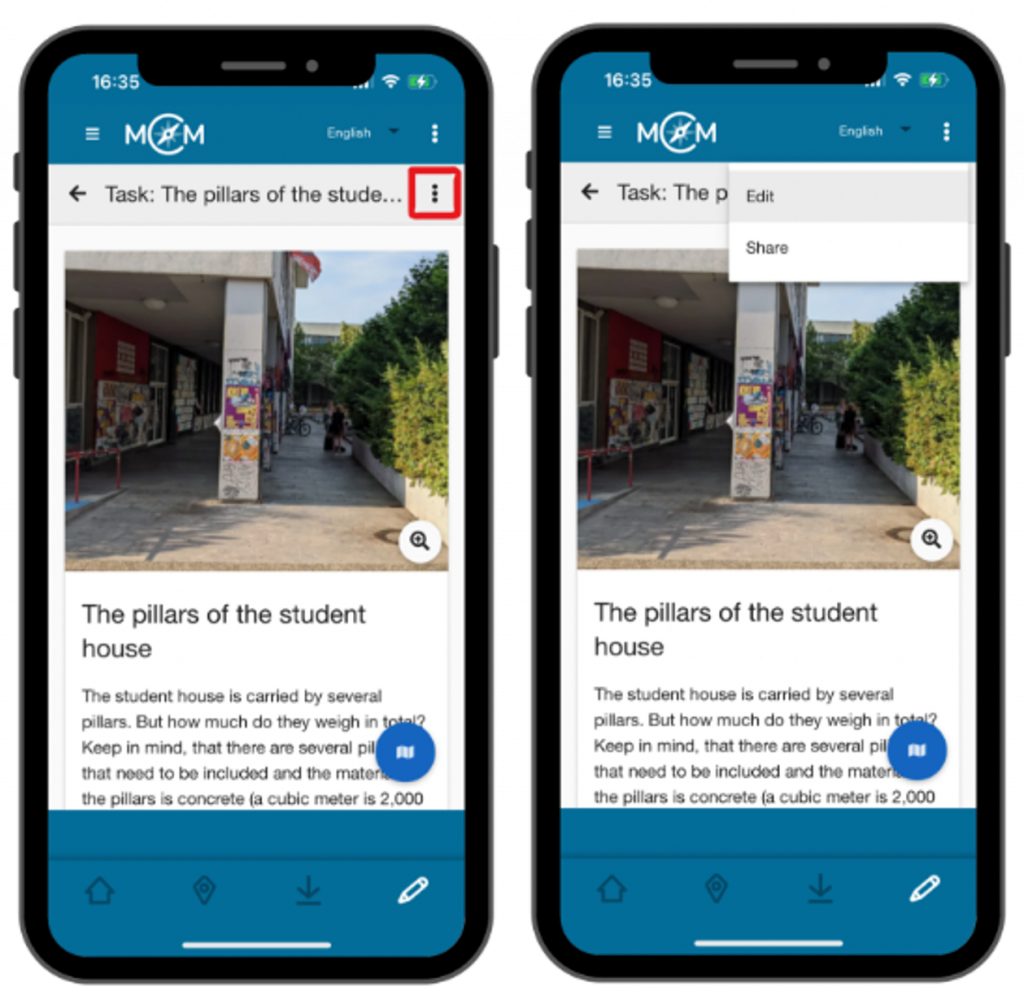
Step 4 – Manage Content

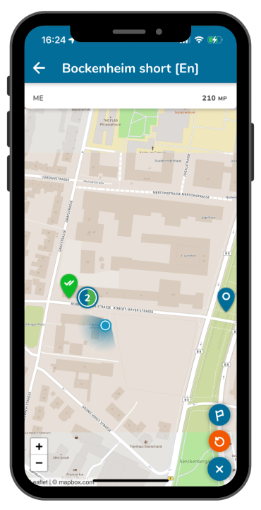
In contrast to using the web portal on a tablet or laptop in the browser, you will find the various management options for your content under the three dots at the top left if you have clicked on a task, a trail or a group.  

Step 5 – Exit the Webportal

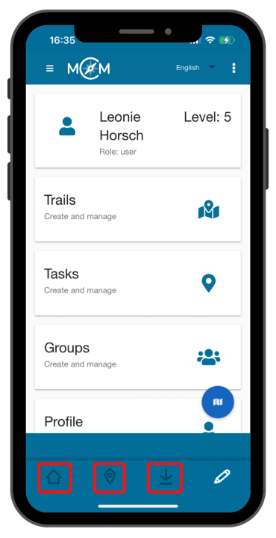
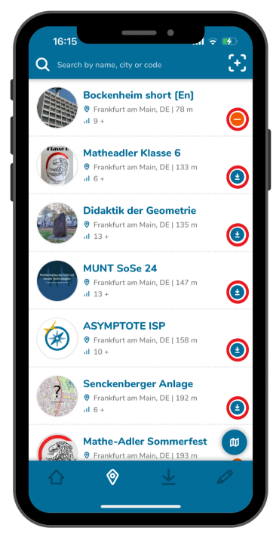
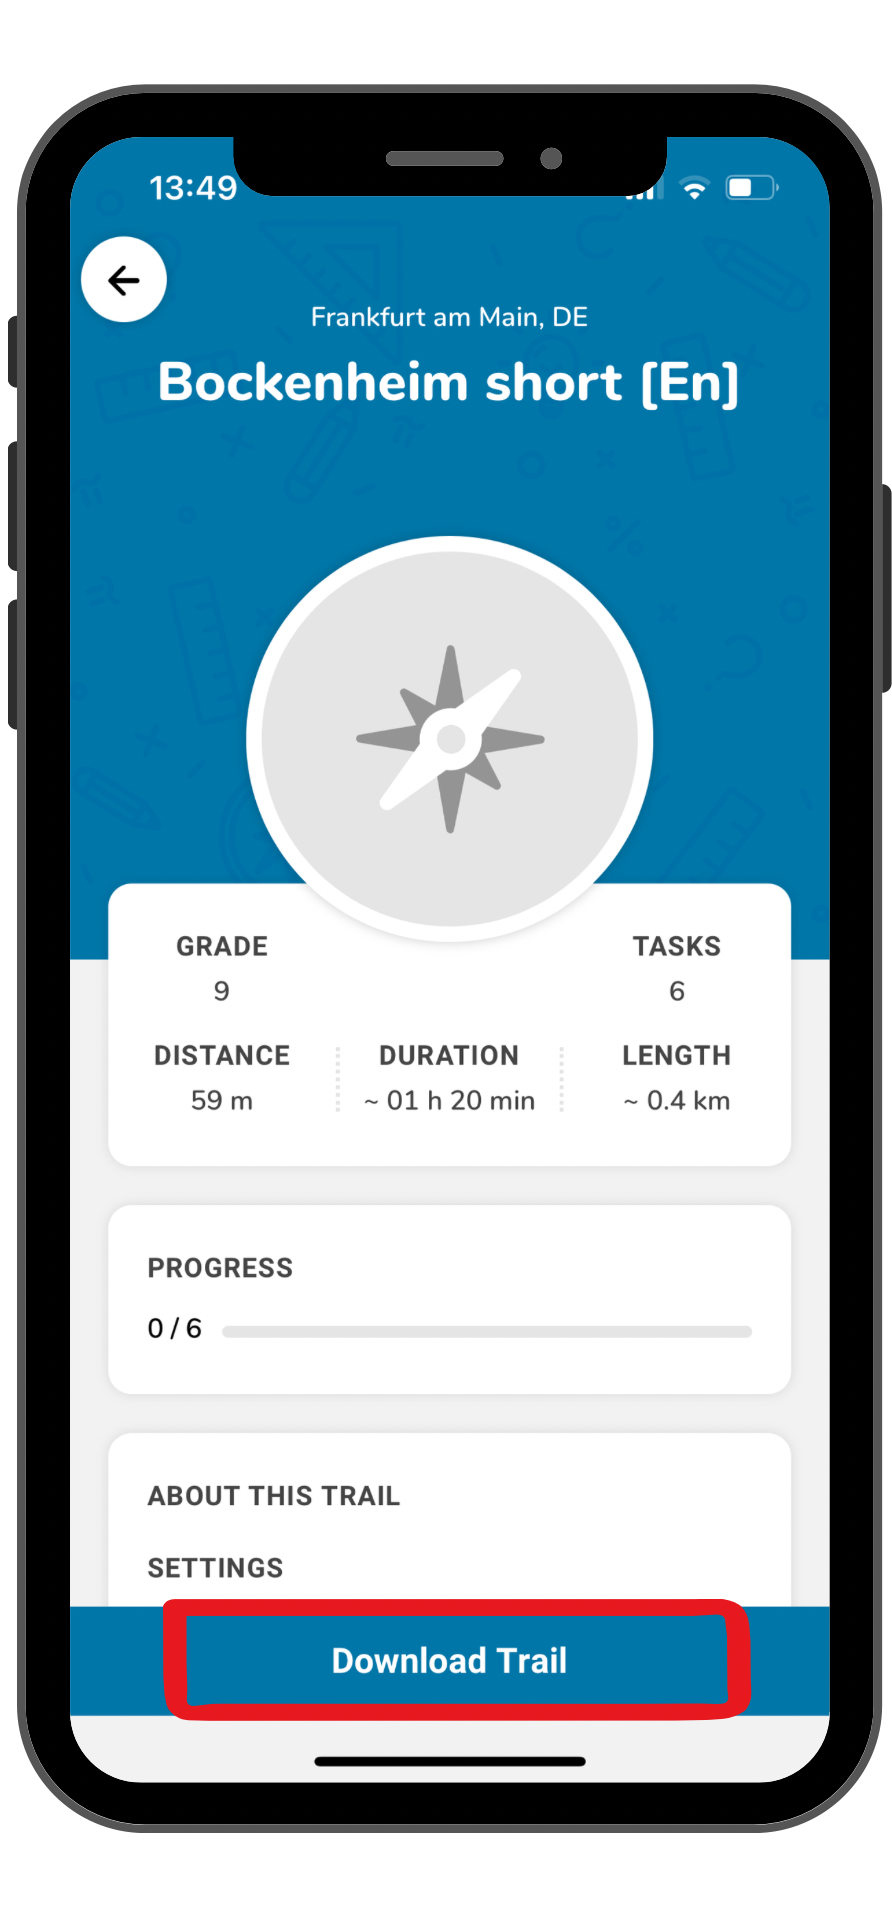
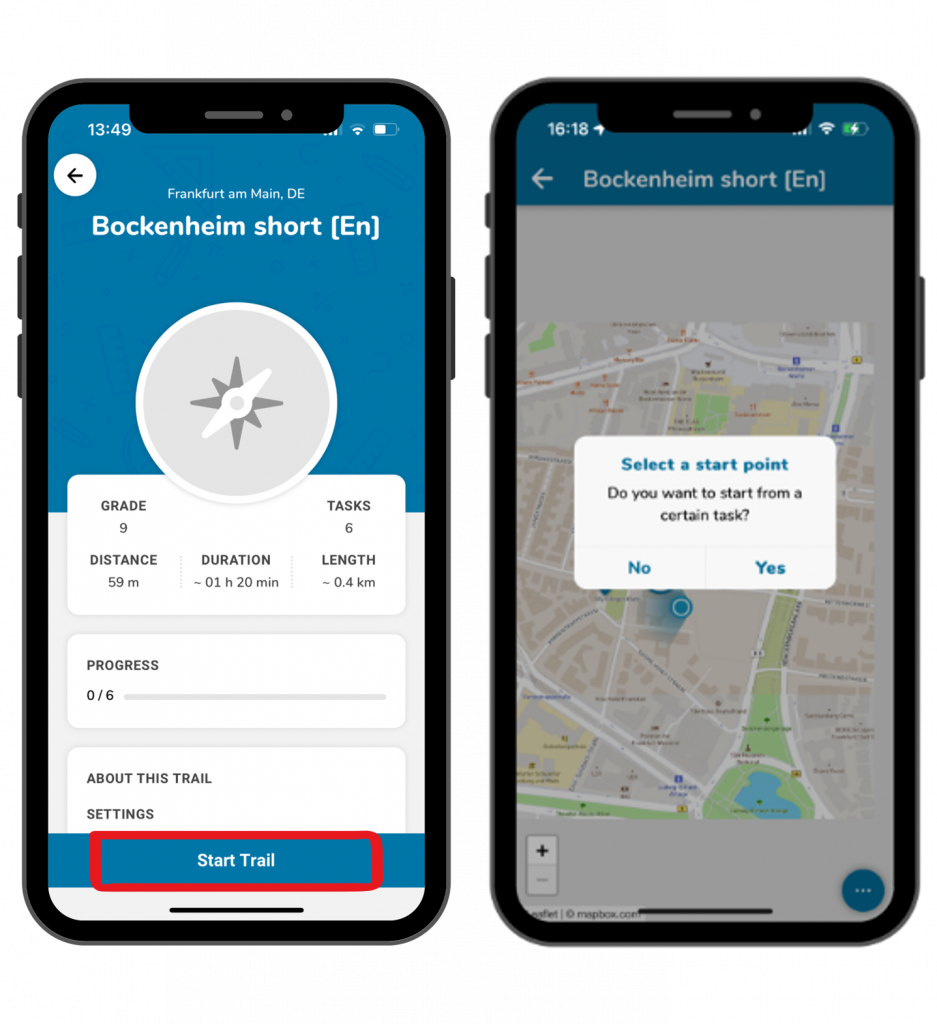
You can return to the various app functions by clicking on one of the symbols in the lower blue field.

The house icon stands for the start page of the app, the location icon for searching for trails and the download icon for your saved trails.

Further Tutorials

Functions in a Digital Classroom

The trail of a digital classroom works like the regular trails, but there are some additional functions. These are explained in more detail in the following steps:

Step 1 – Session Information

Below the title of the trail, you can see how much time you have left to complete the trail, so you know when the session or digital classroom will finish.

You will also find a list of the other teams and their current scores so you can compare yourself with them during the session. 

Step 2 – Task Overview

Click on the three dots at the bottom right to use other functions of the digital classroom.

For example, you can get an overview of the trail tasks by clicking on the flag icon. You can then select a starting task if this has not been selected already.

The blue flag symbol then turns into an orange eye symbol. If you click on it, all the tasks on the map will be displayed again. 

Step 3 – Chat Function

 
You can contact the person leading the session during the digital classroom. To do this, click on the three dots at the bottom right and then on the speech bubble icon.

You can write messages, record voice messages and send photos.

The person leading the session can reply to you in the chat and the messages sent to all participants will also appear there. 

Step 4 – Quit Session

If you want to leave the session early, click on the three dots and then on the orange exit symbol.

Confirm with “Yes” to end the session. 

You will then be given a summary of your achieved score and completed tasks.

Further Tutorials

Add Trails from a Digital Classroom

To add the trail of a digital classroom in the app, you need a specific code. Here is a step-by-step guide on how to add it:

Step 1 – Open the Trails Section

Click on the “Add trails” field on the start page or on the plus symbol at the top right under “Browse trails”.

A window will open with the title “Private Trail or Session”. 

Step 2 – Enter the Code

Codes from digital classrooms differ from codes from regular trails in that they start with an “s”.

You will receive the required code from the person leading the session.

Enter the code and then click “Add”. 

Step 3 – Accept Terms and Conditions

In the digital classroom, the person leading the session receives information about the location and trail progress of the participants.

Participation in the digital classroom is only possible if these terms of use are accepted.

To do this, place a tick next to “Accept terms of use” and then click on “Continue”. 

Step 4 – Team Name

Choose a team name in your group and put it in the first field.

Enter the names of your team members in the second field. Click the plus symbol to add additional members.

Then click “Enter” to join the session.  

Step 5 – Download Trail

You will be shown all the important information about the digital classroom trail.

Click on the blue “Download trail” button at the bottom of the screen to save the trail. 

Step 6 – Start the Trail

The blue button then changes to “Start trail”. Click on it to start walking the trail.

A map view with the tasks will open. 

Further Tutorials

Walk a Trail

Once you have selected and downloaded a suitable trail, you can walk it and complete the various tasks. Starting from the standard settings, here is a step-by-step guide to walking the trail:

Step 1 – Preparation

Before starting the trail, gather any measurement tools you might need. The trail’s information will specify which tools are required.

If you’ve already downloaded the trail, no internet connection is necessary outdoors.

Step 2 – Navigate to the First Task

Egal ob du dir eine Startaufgabe aus der Liste oder direkt von der Karte ausgewählt hast, es wird dir dein aktueller Standort und der Standort der Aufgabe angezeigt.

Laufe nun zu der ersten Aufgabe, das Titelbild hilft dir dabei den genauen Ort zu bestimmen.

Klicke unten auf dem Bildschirm auf das blaue Feld “zur Aufgabe”, damit du die Fragestellung lesen und mit dem Bearbeiten beginnen kannst. 

Step 3 – Solve the First Task

Take the necessary measurements and calculate your solution.

Enter it in the answer field and click “Check” to save it.

You’ll receive feedback on whether the task was solved correctly. 

Step 4 – Feedback

If you have solved the task correctly, a green tick will be displayed and you will receive the full score.

You may receive an orange tick for tasks with a solution interval, for example. In this case, your answer is within a satisfactory range, but could be more accurate.

A red X is displayed if the task has not been solved correctly. You then have the option of entering a new solution. If you enter several incorrect solutions, points will be deducted from the task. 

Step 5 – View Sample Solution

After solving a task or exceeding the allowed attempts, you can view the sample solution. To do this, click on the “Sample solution” field.

There you can see, for example, whether there are alternatives to your solution. If you are in the yellow range of the solution, you can see where you may have made measurement or calculation errors. 

Step 6 – View Hints

If you are stuck on a task, the step-by-step hints can be helpful.

Click on the light bulb symbol to display a hint.

Then try to find a solution or, if necessary, look at the next clue.

Step 7 – Move to the Next Task

Once the solution is accepted, a button will appear prompting you to proceed to the next task.

Click “Next Task” to display the map and the next recommended task.

You can click “Go to Task” or choose a different one. 

Step 8 – Skip a Task

If you cannot solve a task or want to return to it later, you can skip the task.

Click the orange arrow and confirm by selecting “Yes”.

The skipped task will appear as a grey arrow on the map, reminding you to revisit it later. 

Step 9 – Access Additional Features

Clicking the three dots at the bottom opens additional features.

Firstly, you can click on the blue flag symbol. This will give you an overview of the trail’s tasks and you can also select which one you would like to work on next.

Secondly, you can click on the orange arrow symbol. This allows you to reset your progress on the tasks. If you want to do this, you must click on the arrow symbol and then confirm with “Yes”.

If you click on the X, these two fields will disappear, and the three dots will be displayed again. 

Step 10 – Finish the Trail

Once you have completed all the tasks, you can finish the trail. You can also pause the trail at any point.

To leave, click on the white arrow at the top left corner.

Your score is displayed at the top and you can also see your progress in the trail information. 

Further Tutorials

Add trails

The “Add Trails” function allows you to add new trails using their access codes. This also lets you find private trails or share them with others. Here’s a step-by-step guide to adding trails:

Step 1 – Open the Trails Section

Click on the “Add Trails” field on the start page.

A window titled “Private Trail or Session” will open.

Alternatively, you can access this view by clicking the plus symbol in the top right corner of “Browse Trails.” 

Step 2 – Enter the Code

Each trail has its own code so that it can be shared specifically with other MCM users.

Enter the relevant code in the window that appears and click on “Add”. 

Step 3 – View Information

You will receive a notification confirming the trail has been successfully added. After clicking “Ok,” the trail’s details will appear.

This includes grade level, distance from your current location, duration, and length (the route you need to walk).

To ensure this trail is available later in your saved trails, click “Download Trail.”  

Further Tutorials

Download and Start a Trail

To walk a trail, you must first download and then start it. Once downloaded, no internet connection is needed. Here’s a step-by-step guide for downloading and starting trails:

Step 1 – Downloading via Browse Trails

When trails are displayed in list format, click the download icon on the right to download the trail.

Alternatively, click on the trail to view its details first.

At the bottom of the screen, click “Download Trail” to save it.

If you’re searching for a trail on the map, you’ll find a download icon on the right as well or in the trail’s detail view. 

Step 2 – Downloading via Add Trails

After adding a trail, its information will be displayed.

At the bottom of the screen, click “Download Trail” to save it. 

Step 3 – Start the Trail

Once the trail is downloaded, the blue button at the bottom of the screen changes to “Start Trail.” Click it to begin.

You’ll be asked if you want to start from a specific task. This is useful when multiple groups are participating, so they do not all begin at the same point.

Clicking “Yes” lets you choose a starting task.

Clicking “No” displays all tasks on the map so you can pick one, such as the one closest to your location. 

Further Tutorials

Browse Trails

Browsing trails is a useful feature for discovering new trails nearby or at specific locations. This feature only allows you to find public trails. Here’s a step-by-step guide to browsing public trails:

Step 1 – Open the Trails Section

Click on the “Browse Trails” field on the start page.

This will open a page of trails located near your current location.

Step 2 – Find Nearby Trails

If you’re looking for a nearby trail, you can select one of the displayed trails.

You’ll see the trail’s title, the city where it’s located, the distance from your location, and the mathematical grade level required for the trail.

To the right of each trail, you’ll find a blue download icon for unsaved trails or an orange minus icon for trails you’ve already downloaded. 

Step 3 – Find Trails in Other Locations

At the top of the search bar, you can search by the name of a trail or the city where it’s located.

You can also enter a trail code.

On the one hand this allows you to find specific trails or on the other hand to discover new trails on a particular topic or in a specific area.

Step 4 – Find Trails on the Map

In the bottom right corner there is a map icon. If you click it, it will open a map starting from your current location.

By zooming in and moving the map, you can also search for trails in a specific location or explore various trails in the area.

By clicking the list icon, the trails will appear in list format again.  

Further Tutorials

Read Aloud Function

The read aloud function enables app users to listen to trail information or task assignments. Here is a step-by-step guide on how to activate and use this function:

Step 1 – Open settings

Click on “settings” next to the cogwheel symbol at the top left of the start screen.

A view with various setting options will open.

Step 2 – Activate read aloud function

Under the title “accessibility” you will find the read aloud function.

Click on the switch on the right side to activate the function.

By clicking on the switch next to “configure”, you can select different languages and voices.

Step 3 – Use read aloud function

 
As soon as the read aloud function is activated, you can use it in the app. This works for trail information and task assignments.

To use the read aloud function you have to click on the text for a longer time.

A yellow field will come up at the bottom of the screen. By clicking on the arrow, the read aloud process will be repeated. By clicking on the X, the yellow field will disappear.

Further Tutorials

Automatic Translation

With automatic translations you can walk trails or solve tasks in different languages that you normally wouldn’t understand. Here is a step-by-step guide on how to activate and use translations in the app:

Step 1 – Open settings

Click on “settings” next to the cogwheel symbol on the top left of the landing page.

A view with various setting options will open.

Step 2 – Activate translation function

Under the title “language” you can select different languages for the app, but you can also activate translations.

Klick on the switch next to “translations”, to enable translations for trails and tasks.

Under “translation language” you can select different languages.

Schritt 3 – Using the translation function

 
As soons as the function is activated in the settings, a translation button will come up for trails and tasks in the top right corner of the screen.

By clicking on the button, the trail or task will be translated in the language that you have selected in the settings.

As soon as you request the translation, a yellow frame will come up on the screen. That way you know that you are not looking at the original, but at the translation. By clicking on the translation button again, you will come back to the original.

Further Tutorials

App Settings

The settings help you with an optimal use of the MathCityMap app. Here are a few steps to different settings:

Step 1 – Open Settings

Click on “Settings” at the top left of the start screen. There is also a cogwheel symbol next to it.

This opens a view with various setting options. 

Step 2 – Tutorial

There is also a short explanation of how to use the app directly in the app. Click on the blue field “How MathCityMap works”.

The tutorial will open and you can switch to the next page by swiping.

When you are finished, click on the cross at the top right and you will be taken back to the settings.  

Step 3 – Language

 
The language of the app is initially set to English if you have downloaded it via an English app platform. However, you can of course also use it in other languages.

To do this, click on the selected language under “Language” and select a different one.

Confirm with “Ok” and the app will automatically update all texts and menus. 

You can also get a translation for trails and tasks. Look at the tutorial “Automatic Translations” for further information.

Step 4 – Accessibility

In the app you can use a read aloud function for trail information and task definitions.

Look at the tutorial “Read Aloud Function” for further information.

Step 5 – Expert Tools

The menu item for managing trails is not yet activated in the default settings.

If you also want to use the MathCityMap web portal via the app and thus manage your trails, you must activate the slider under “Management functionality”.

You can then select the fourth menu item on the start page.  

Step 6 – Data Management

If you want to delete your app data, click on the orange “Delete App Data” field at the bottom.

This will reset the app to the default settings and delete all saved trails, map data and images.

Confirm with “Yes” or click on “No” if you want to keep your data.

You can also view your saved trails and delete individual ones.

Further Tutorials