Browse Trails

Browsing trails is a useful feature for discovering new trails nearby or at specific locations. This feature only allows you to find public trails. Here’s a step-by-step guide to browsing public trails:

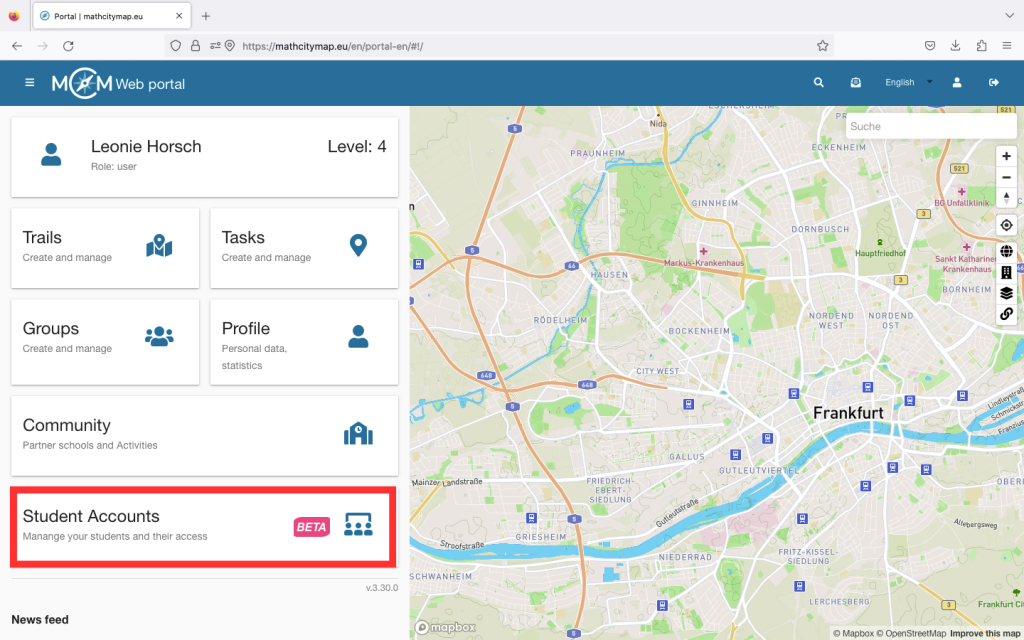
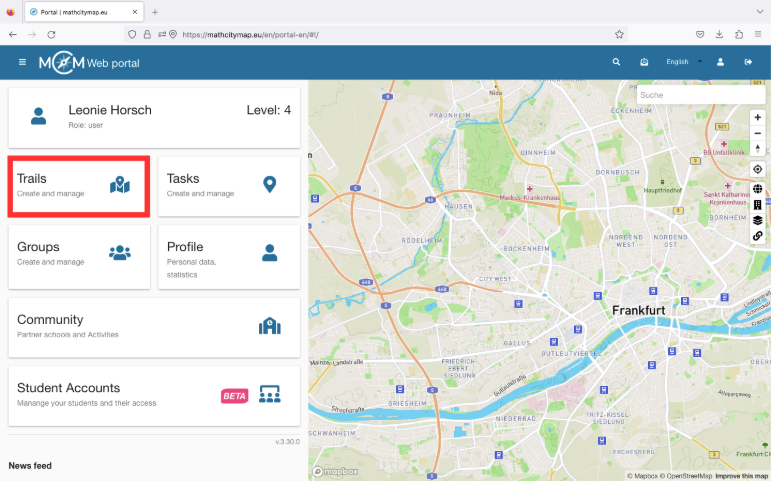
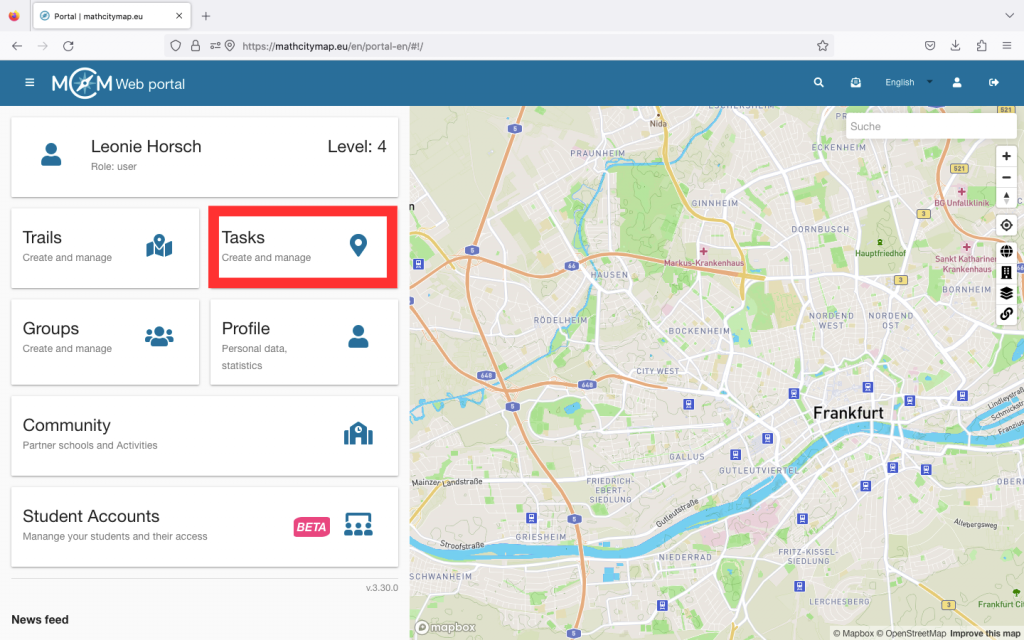
Step 1 – Open the Trails Section

Click on the “Browse Trails” field on the start page.

This will open a page of trails located near your current location.

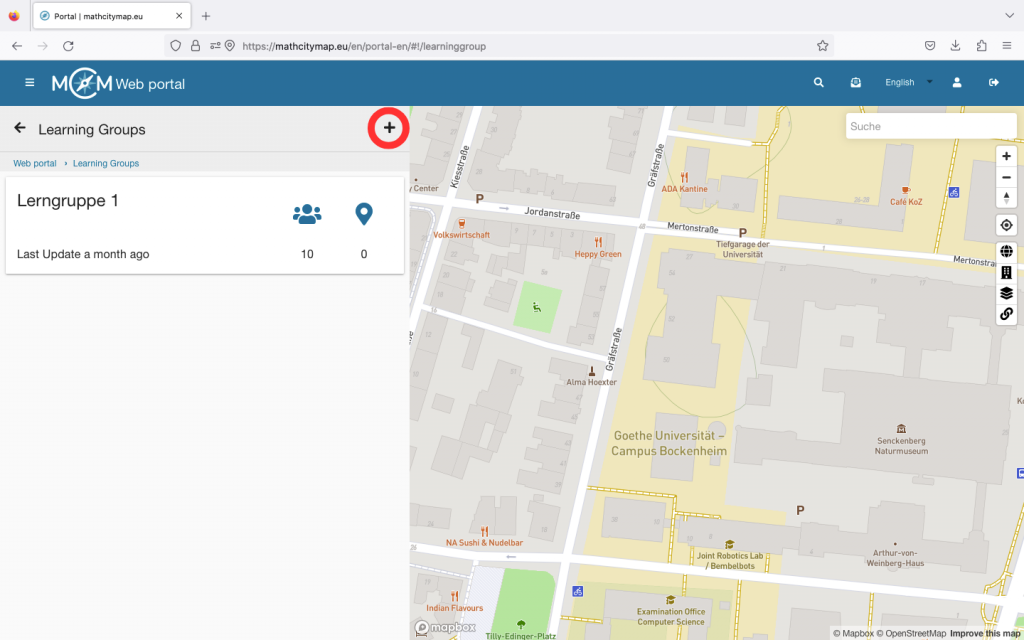
Step 2 – Find Nearby Trails

If you’re looking for a nearby trail, you can select one of the displayed trails.

You’ll see the trail’s title, the city where it’s located, the distance from your location, and the mathematical grade level required for the trail.

To the right of each trail, you’ll find a blue download icon for unsaved trails or an orange minus icon for trails you’ve already downloaded. 

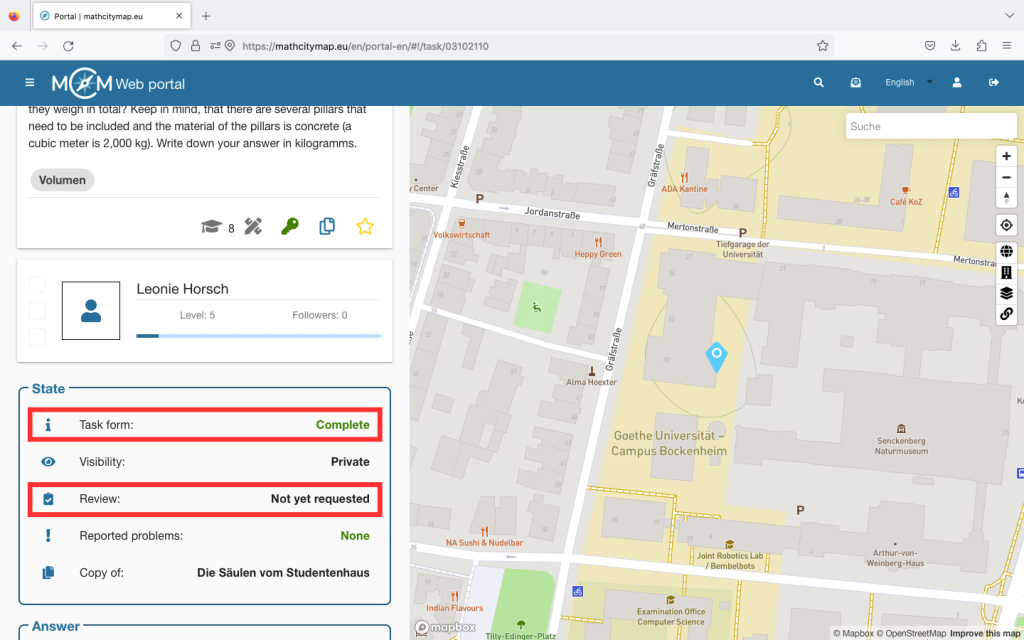
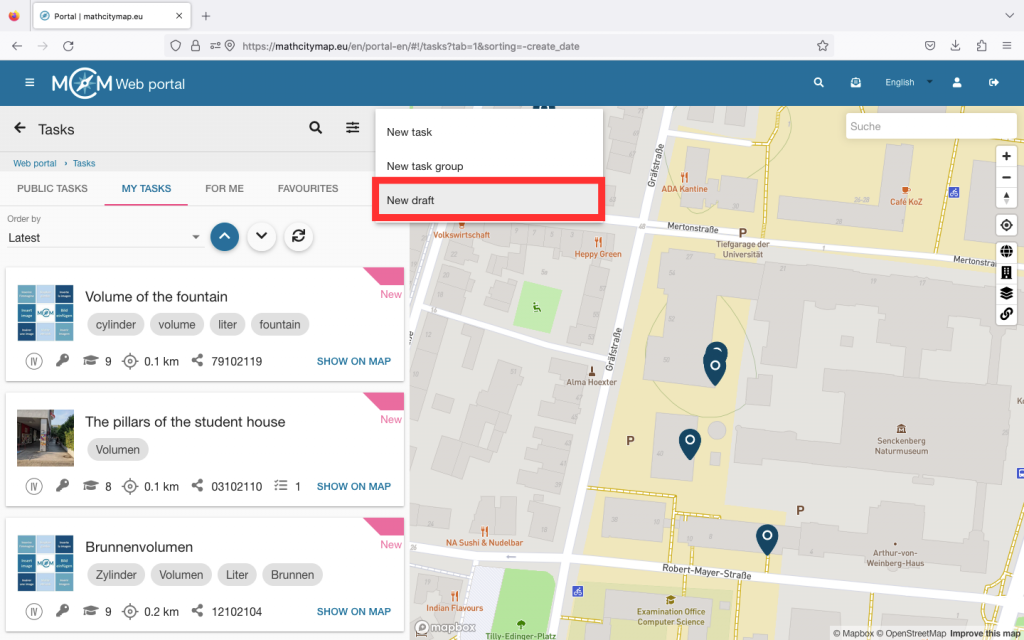
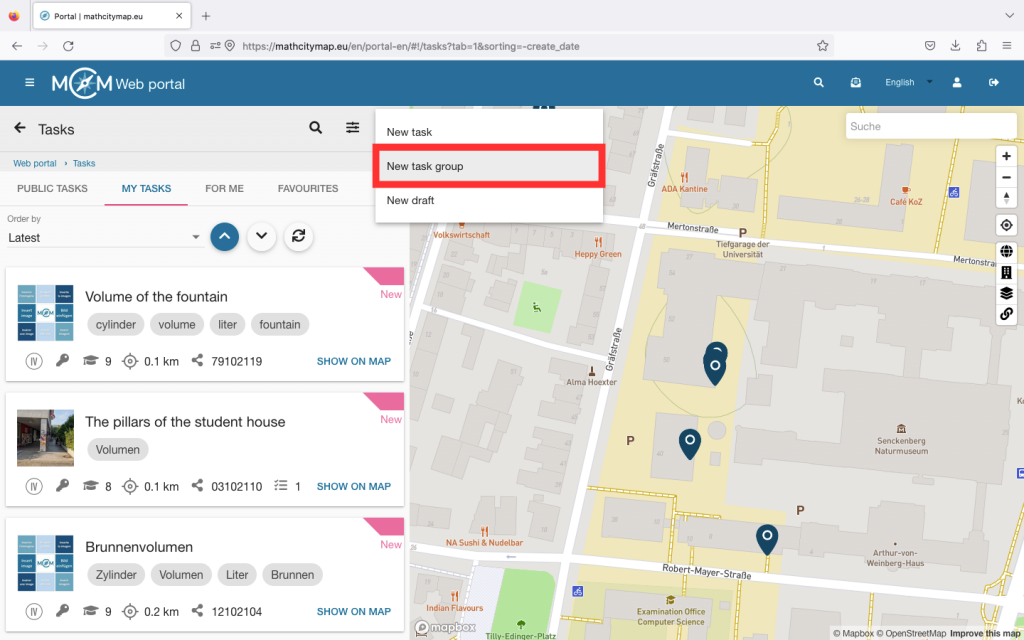
Step 3 – Find Trails in Other Locations

At the top of the search bar, you can search by the name of a trail or the city where it’s located.

You can also enter a trail code.

On the one hand this allows you to find specific trails or on the other hand to discover new trails on a particular topic or in a specific area.

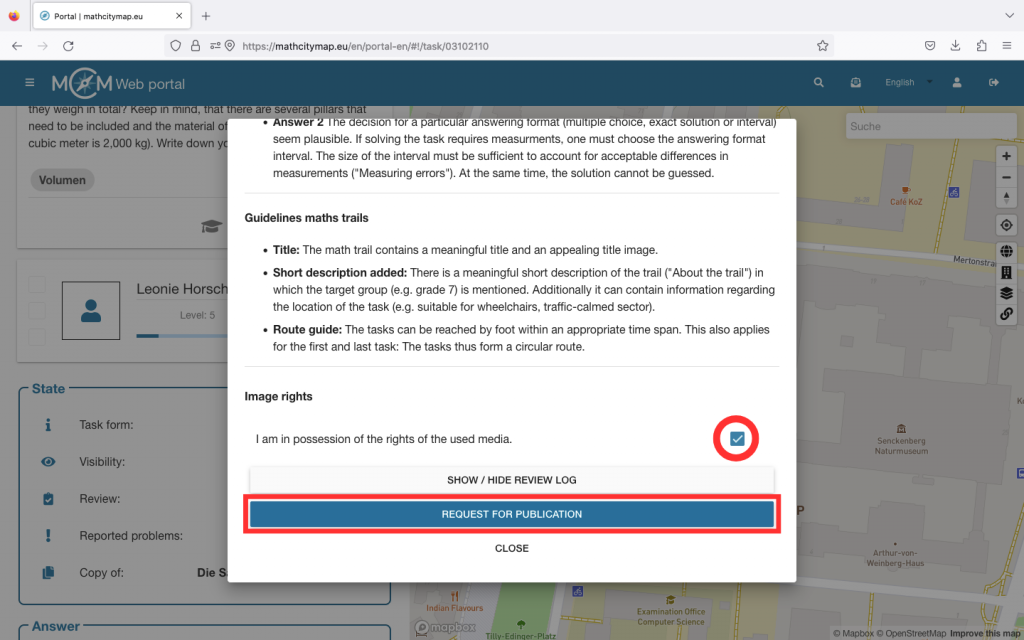
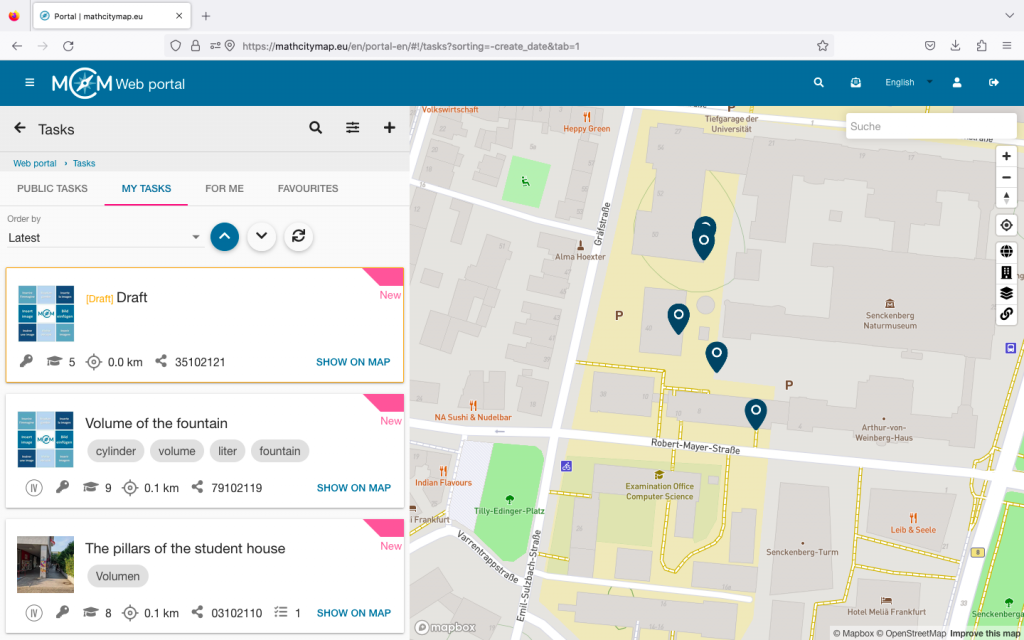
Step 4 – Find Trails on the Map

In the bottom right corner there is a map icon. If you click it, it will open a map starting from your current location.

By zooming in and moving the map, you can also search for trails in a specific location or explore various trails in the area.

By clicking the list icon, the trails will appear in list format again.  

Further Tutorials

Create Learning Groups

Creating learning groups in the MathCityMap web portal allows learners to create and share tasks themselves. Here is a step-by-step guide on how to create learning groups:

Step 1 – Open the learning group area

Click on the “Student accounts – Manage your students and their access” field on the start page or select “Learning groups” in the menu bar on the left-hand side.

The page with your learning groups opens.

Step 2 – Create a learning group

You will find a plus symbol at the top right. Click on it to start creating a new learning group.

You will then be asked to enter the basic data for your learning group. Choose a unique name and enter an abbreviation for the learning group.

You must then enter the number of learners. Finally, click on “Create learning group”.

You will then be shown the access data to the web portal for the learners. Share these with your learning group so that the learners can log in to the web portal.

Further Tutorials

Publish Content

You can publish content in the MathCityMap web portal so that other MCM users can also see and try it out. Please note the following steps:

Portal

Step 1 – Complete your task / trail

Only tasks that fulfill all technical requirements can be published. Therefore, make sure that you fill in all fields and also add a title picture.

If you click on your task, you can see under “State” whether your task form is complete or not. The same applies to your trails.

Step 2 – Request publication

You need a review to publish a task. This ensures that not only all technical requirements are met, but also that the quality of the task, the sample solution and the notes are appropriate.

Click on “Review” under “Status”. A window will open with all the information regarding the requirements for your task or trail.

Make sure that you have the image rights for the media you are using and confirm this by ticking the box at the bottom.

Then click on “Request for publication”. This process may take a few days.

Further Tutorials

Manage Digital Classroom

The digital classroom offers many possibilities. Here you will learn how to observe, manage, and support your digital classroom live during, before or after the math trail.

Portal

Step 1 – Switch to the observation view

Open the trail for which you have created your digital classroom and click on the corresponding icon.

Depending on when you want to open the digital classroom view, you will find your digital classroom under “Ongoing,” “Upcoming,” or “Completed.”

Click on the desired digital classroom to open the observation view.

Step 2 – Overview in the “Ongoing” observation view

At the top of the view, you can see how many minutes are left, meaning when the digital classroom will automatically end.

The view shows a list of all joined groups with names, status, and points on the left side. The number after the hashtag indicates the order in which the groups joined. The group with the most points is always at the top of the list.

For each group, you can see round fields that represent the different tasks. A white field means the task has not yet been viewed. Blue means the task has just been opened. Red, yellow, and green stand for incorrectly, satisfactorily, or well-solved tasks. A grey field means that this group has skipped the task.

If you click on a group, you will access the chat. Here, you can communicate with the participants via message, voice note, or pictures throughout the session. Under “Events,” you can see how the learners proceed — for example, whether they use hints and whether they need multiple attempts to solve a task.

On the right side of the view, there is a map showing the tasks and the joined groups (provided they activate GPS). Through numbering and colour coding, the groups on the map can be easily found again in the list.

Step 3 – Additional functions in “Ongoing”

At the top right, there is a chat icon. By clicking on it, you can send a message to all participants at once. Use this, for example, for time-related hints.

Under “Settings,” you can, for instance, extend the session duration or adjust your view. You will also find some information about your digital classroom there.

Under “Events,” you can see all the actions of the joined groups. For a more compact view, select individual groups and then go to “Events.”

To remove members, click on the corresponding group and then click on the X in the top right. Confirm the action with “OK.”

Step 4 – Manage upcoming digital classrooms

Up to 30 minutes before the start of the session, you can adjust the settings of your digital classroom.

The same settings can be edited as when creating the digital classroom.

During the session and in the 30 minutes beforehand, editing is no longer possible.

Step 5 – Manage completed digital classrooms

Up to 6 months after the session, the collected data of the digital classroom can still be viewed.

For example, you can gain insights into which tasks were easy for the learners and which may have caused problems more frequently. These can be discussed again during a joint review session.

Weitere Anleitungen

Create a Digital Classroom

In the MathCityMap web portal, a digital classroom can be set up for a math trail, offering organizational and educational tools. Here you will find a step-by-step guide to creating a digital classroom:

Portal

Step 1 – Select an Existing Trail

To select an existing trail, click on the “Trails – Create and Manage” field. You can also click on “Trails” in the menu bar on the left.

A view with your trails will open. Click on the desired trail to open its detailed view.

You can also create a digital classroom with public trails. Click on the desired trail to open its detailed view.

Step 2 – Switch to the “Digital Classroom” area

In the top left, you will see an icon showing a figure in front of a blackboard. Click on it to open the digital classroom section.

Here, you’ll see an overview of already created classrooms (if any), as well as a “New” button to create a new digital classroom.

Step 3 – Create a new digital classroom

After clicking “New,” the digital classroom editor will open.

First, fill out the general information: The name of the digital classroom will be displayed to the learners in the app, select the date and time for the session (learners can join 30 minutes before the start), and set the duration of the digital classroom (after the time has expired, the session will end for all participants).

You can also write a welcome and farewell message. These will be shown to all participants at the beginning and end or when leaving the session.

In the settings, you can enable or disable the leaderboard. The leaderboard is a local ranking list and shows your team’s score, as well as the score of the team ahead and the team behind.

With the automatic task assignment feature, you can control whether all participants should start with the same task or whether they should first spread out among the tasks.

Click on “Create” to save the settings. The digital classroom will then appear under “Ongoing” or “Upcoming” depending on the start time. In the square brackets, you’ll find the associated code starting with an “s.” Share it with your learners so they can join the digital classroom.

Weitere Anleitungen

Draft and Task Group

In the MathCityMap web portal, you can prepare tasks in draft mode before you finish creating the task. You can also bundle tasks that are all related to the same object into task groups. Here is a step-by-step guide on how to create drafts and task groups:

Portal

Step 1 – Create a new task

Go to “Tasks – Create and manage” or select “Tasks” in the menu bar on the left-hand side.

Then click on the plus symbol at the top right and select “New draft”.

You will then be asked to enter basic data for your task.

Click on “Create” to save your draft. 

Step 2 – Edit drafts

Like all other tasks, you can find drafts in your profile under “My tasks”. All drafts are framed with a yellow box.

If you want to complete the task, you can simply click on it and edit the task.

Once you have entered the missing information, click on “Save”.

Step 3 – Create task groups

Go to “Tasks – Create and manage” or select “Tasks” in the menu bar on the left-hand side.

Then click on the plus symbol at the top right and select “New task group”.

You will then be asked to create the first task in your task group.

Once you have entered all the information, click on “Create” at the bottom.

Step 4 – Add subtasks

To complete your task group, you need to create additional subtasks.

If you click on your task group and scroll to the bottom, you will be taken to the “Subtasks” section. Click on the plus symbol to add further subtasks to your task group.

The page for creating a task opens again. Click on “Create” to save the subtask.

Finally, you can change the order of the subtasks. To do this, click on the “Change order” button and move the subtasks so that they are in the right place.

Then confirm that you want to save the changes.

Further tutorials

Support Tasks

Support tasks are additional tasks designed to help learners better understand more complex tasks or calculate intermediate steps. These tasks can facilitate the learning process by focusing on and supporting partial aspects of a main task. Here is a step-by-step guide to creating and using support tasks:

Portal

Step 1 – Open task area

Go to “Tasks – Create and manage” and under “My tasks” select the task for which you would like to create support tasks.

This task then becomes the main task and can be subdivided by one or more support tasks.

Click on the desired task and then scroll to the bottom.

Step 2 – Create a support task

You will see a box with the title “Support tasks”. Click on the plus symbol on the right-hand side to create a new support task.

You will then be asked to enter all the basic information again, as when creating the main task.

You only do not need to enter the location, as this is the same as the one of the main task.

Once you have entered all the information, click on “Create”.

Step 3 – Multiple support tasks

For complex tasks, it can be helpful to create several support tasks. To do this, click on the plus symbol again and create another support task.

You can then determine the order in which the tasks should be processed. To do this, click on the “Change the order” button and move the support tasks so that they are in the right place.

Then confirm that you want to save the changes.

Further Tutorials

Task-Wizard

The task-wizard is a helpful tool to make the creation of tasks in the MathCityMap web portal easier and faster. It works for some of the standard tasks. Before using it, you must have already thought about the task and collected measured values. Here is a step-by-step guide on how to use the task-wizard:

Portal

Step 1 – Open the task-wizard

When you create a task, you will see a magic wand icon in the top right-hand corner. Click on this to open the task-wizard function.

Step 2 – Enter basic data

First select a suitable topic for your task.

You can then select an object that matches the topic.

Then you need to specify what you are looking for in your task.

Fields will then open in which you should enter your measured values.

Once you have entered everything, click on “Apply”.

Step 3 – Check and complete the data

The task-wizard automatically formulates a suitable task and also creates the sample solution and appropriate hints.

Think about whether you want to adjust the title and add a cover image.

Click on the position on the map where your object is located and click on “Create” at the end.

Further Tutorials

Groups and Sharing Content

You can join groups or create your own groups and share your content in them, making tasks and trails available to other members. Here is a step-by-step guide on how to create groups, join them and share content:

Portal

Step 1 – Open group area

Click on the “Groups – Create and manage” field on the start page of the web portal or select “Groups” in the menu bar at the top left.

You will then be shown the groups that you have already joined.

Step 2 – Searching your groups

If you have already joined several groups and are looking for a specific one, it may be helpful to click on the magnifying glass symbol.

There you can search for the title and the matching groups will be displayed at the top.

Step 3 – Joining a group

To join an existing group, you will need the corresponding code. The person who created the group can share it with you.

You can enter it by clicking on the join symbol in the top right-hand corner.

Then click on “Join a group”.

Step 4 – Create a group

Click on the plus symbol to create a new group.

You will then be asked to enter a group name.

Click on “Create” or confirm with Enter.

Step 5 – Manage group

If you click on the share icon, you will be shown the access code for your group. You can share this with other people so that they can join your group.

You can also delete your group by clicking on the trash can icon.

You can leave the group by clicking on the leave icon.  

Step 6 – Share content

When you click on a group, you will see the members, the shared tasks and the shared trails.

To share content yourself, you must first create your own tasks or trails.

You will then find the share icon at the top right of your tasks. If you click on this, you can select the group in which you would like to share the content.

Click on “Save” to share the content in the selected group.

Further Tutorials

Conducting Lessons with MCM

MathCityMap is a great way to make math lessons interactive and hands-on by having learners solve math problems outdoors. Here are a few steps on how to conduct your lessons with MCM:

Portal

Step 1 – Preparation

Before the planned lesson, you should look for suitable tasks or, if necessary, create your own tasks. Think about what content you want to work on or deepen and then search for suitable tasks in the web portal using the filter functions.

Also pay attention to the location of the tasks. It should be easy to reach with the class.

Then create a trail to summarize the tasks. You can also create a digital classroom, share the trail with the learners there and monitor their progress.

If necessary, you should also organize a range of materials beforehand, such as a folding ruler, measuring tape or calculator. When carrying out the trail, learners can also take a piece of paper and pencil with them to write down their calculations.

Step 2 – Preparation in the classroom

The trail is intended to take up and deepen the content of the lesson, so it may be useful to discuss the various mathematical concepts again.

For the implementation, you can either download the trail and its tasks as a pdf and print it out for the learners or use the MathCityMap app.

It is best for learners to work in small groups of around three people.

Only one mobile device per group is needed when working with the app.

Briefly explain how to use the app and discuss how much time the learners have for the trail and where they should meet at the end of the time.

The trail you have created has a code so that you can share it specifically with your learning group. This can be found in the information about your trail. Share it with the learners so that they can download the trail. This means they don’t even need internet access when they are outside.

Step 3 – Go outside and solve tasks

Take your class outside to the place where the tasks have been placed. The learners navigate to the individual tasks using the MCM app or the printed map.

It is best for the individual groups to start at different tasks so that they do not get in each other’s way.

On site, the learners take measurements and work on the questions.

Depending on the teacher’s settings, they can receive direct feedback on the accuracy of their solution in the app.

Step 4 – Follow-up in the classroom

After the outdoor phase, you can discuss the learners’ experiences together in the classroom. You can talk about specific tasks and solutions, as well as different strategies.

It is best to use MathCityMap not only for one outdoor math lesson, but to integrate it regularly into your lessons. Over the course of the school year, learners can always solve new tasks and, if possible, create tasks themselves.

Further Tutorials