The third article in our “Behind the Scenes” category is intended to conclude the first thematic block, the process of publishing and reviewing tasks. The two previous articles dealt with the steps up to the request for publication on the side of the users and the criteria according to which we, the MCM team, decide whether a task is to be published or not yet. In the following, we would like to illustrate the steps of a review by means of a specific example.


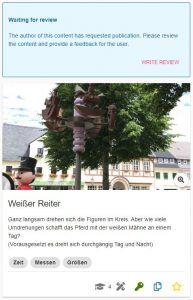
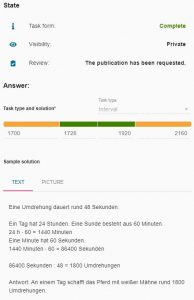
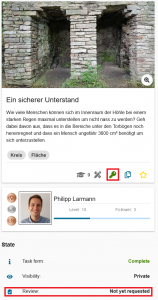
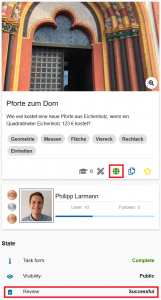
In the task “Weißer Reiter” (“White Rider”) you have to observe the rotation of a figure and on the basis of the duration of a rotation you have to calculate how often the figure would rotate around its mounting in a whole day. The task actually corresponds to all criteria discussed in “Behind the Scenes Part II”, but the solution interval is designed in such a way that it does not lie evenly around the value of the sample solution. Here a duration of the rotation of 48 seconds was assumed. In the green solution interval one remains if one would measure 45 to 50 seconds. So, downwards there is a tolerance of three seconds, upwards a tolerance of only two seconds. The situation is similar for the orange interval. So before the task is published, we would contact the person who created the task. To do this, we click on the “Write Review” button that can be seen in the upper part of the left image.


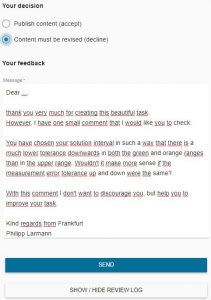
Now you reach a screen where you can choose whether the task should be published or whether it should be revised again or, as in our case, checked. In addition, you can write a written feedback, in which you can either inform that the task has been accepted or address the criticisms and suggestions in such a way that the creator is encouraged to revise or review his task and resubmit it.
By clicking on ” Send “, the task creator will receive a email with the written text. In case of a preliminary rejection, he can now revise and resubmit the task. In addition, he will receive the contact details of the reviewer in order to be able to discuss the points mentioned before the resubmission, if necessary.
If the person who created the task or trail requests publication again, the MCM team member who reviewed the task or trail the previous time will receive a notification by email. The described process now starts again, whereby all previous developments and messages can be tracked and followed via a review log.

The topic of the second post in our new “Behind the Scenes” category is reached by clicking on “Review” in the trail or task view in the web portal, as described in the last post. Here, users can request that their trail or task be published. But how can we the MCM team actually access the requests and according to which criteria are the requests accepted or rejected? We will answer these questions in the article below.


All requests for publication converge on the MathCityMap team’s side in the “Reviews” section of the web portal. This special area is only visible to reviewers. Reviews can currently only be performed by members of the MCM teams at universities around the world. In the long term, however, a review seminar is planned in which one can obtain the authorization to perform reviews of trails and tasks.
By clicking on “Reviews” we now get to an overview where all trails and tasks are listed whose review process has not yet been completed. This is either the case if the review has not been started yet or if there are still ambiguities in the tasks or trails that are being reworked by their creating users. In the image below you can see this overview for trails. It shows the title of the trail, in which language the trail was created and when the trail or task was submitted for the first time.


After selecting a trail we get to its overview where we review all tasks individually. When reviewing the tasks, we pay special attention to various criteria:

  1. Uniqueness. For each task, an image must be used to accurately identify the situation, or object, that the task is about.
  2. Presence. The task can only be solved on the spot, which means that the task data must be collected on the spot. This also means that the picture or the task text may not be sufficient to successfully complete the tasks.
  3. Activity. To solve the task an activity is necessary, i.e. you have to do something yourself (e.g. estimating, measuring or counting).
  4. Reality. The task should have an application, be realistic and not appear too artificial.
  5. Tiered aids. At least two tiered hints should be added to each task.
  6. School math and tags. The task should have a relationship to school mathematics, which are assigned to the task as keywords (tags). Similarly, the task should be assigned a grade level.
  7. Solution Formats. Each task should be based on a meaningful answer format, such as intervals for measurement tasks.
  8. Sample solution. A sample solution should be added to each task (visible to learners only after the task has been completed) to allow comparison of the learner’s own solution with the expected solution.

If all tasks meet the above criteria, there is one last criterion for the publication of the trail in addition to those already mentioned. This is especially relevant if the trail is explicitly designed for school classes.

9. Practicability. The tasks of the trail should be within an appropriate radius for the intended time of realization. Furthermore, it makes sense if the tasks are arranged in such a way that they form a circular trail with the start and finish as close to each other as possible.

However, we would like to show you in the next article of our category “Behind the Scenes” what exactly happens from the application to the publication and how this looks in the portal on the MCM teams side with an example task.

In this small new category, we’ll be taking a look at topics that normally play a big role behind the scenes at MathCityMap. With this, we would like to give you a brief insight into things that would otherwise remain hidden from you. In today’s post, we want to look at the difference between public and private tasks and trails. Herewith we already want to tease the topic of the next post of this category.


After successfully creating a trail or task, there are two ways in which this trail or task exists in the MathCityMap portal. On the left image you can see the normal way. The task or trail is private, which is indicated by the green key icon. This means that the trail or task can only be found by users to whom the creator has submitted the associated code. When users search for trails in their area with the app, private trails are not displayed and thus cannot be experienced.

The second state for a trail or task is “Public.” Public trails and tasks can be found by all users around the world. This is indicated in the portal beside the field “Visibility” by the green globe, which can be seen in the picture on the right. Public trails and tasks are the heart of MathCityMap, with the help of which the whole community can benefit from the creativity and inventiveness of all its individual members. 

But how can you make your own trail public? There is a central button in the web portal for this purpose, which makes MathCityMap accessible to many people who only use the app and do not create tasks and trails in the portal themselves. Clicking on “Review” (shown in both images) brings you to a pop-up window where you can request publication. What happens behind the scenes on the MathCityMap team until the trail or task is public will be the topic of the next article in this category…