Step 1 – Switch to the observation view
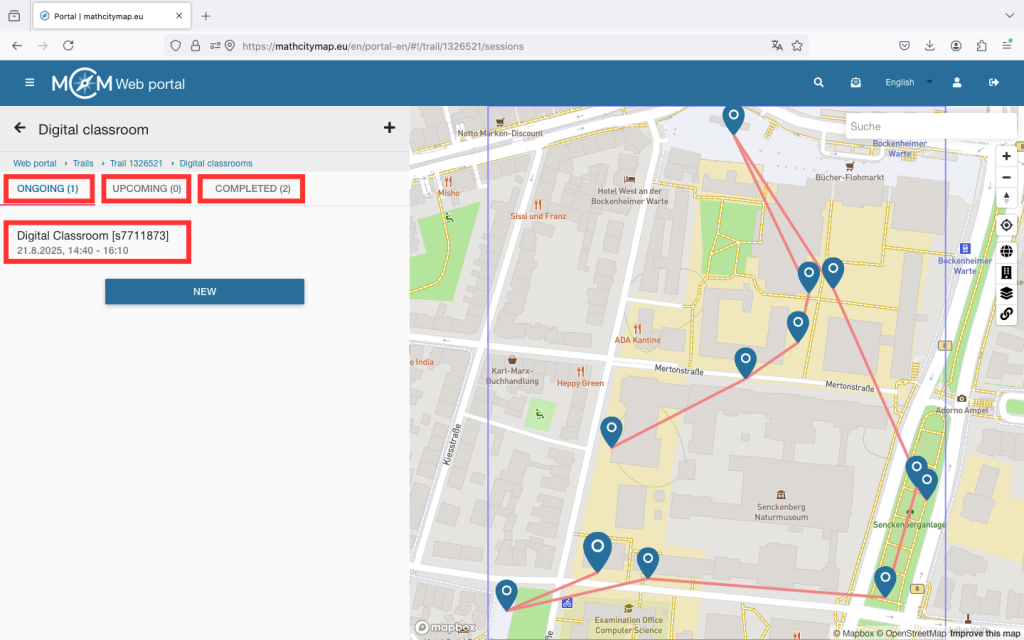
Open the trail for which you have created your digital classroom and click on the corresponding icon.
Depending on when you want to open the digital classroom view, you will find your digital classroom under “Ongoing,” “Upcoming,” or “Completed.”
Click on the desired digital classroom to open the observation view.
Step 2 – Overview in the “Ongoing” observation view
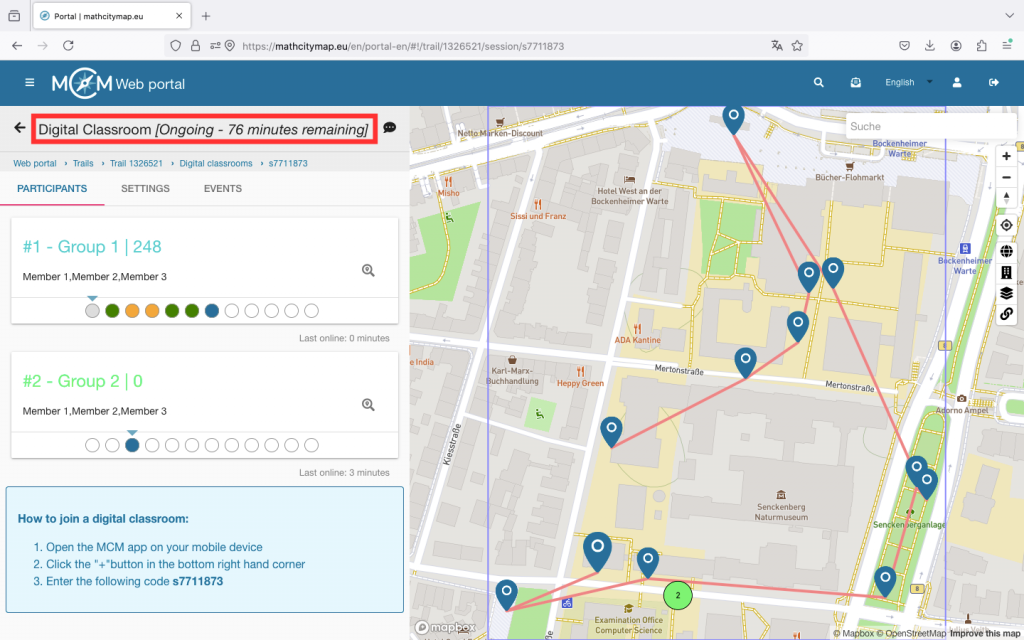
At the top of the view, you can see how many minutes are left, meaning when the digital classroom will automatically end.
The view shows a list of all joined groups with names, status, and points on the left side. The number after the hashtag indicates the order in which the groups joined. The group with the most points is always at the top of the list.
For each group, you can see round fields that represent the different tasks. A white field means the task has not yet been viewed. Blue means the task has just been opened. Red, yellow, and green stand for incorrectly, satisfactorily, or well-solved tasks. A grey field means that this group has skipped the task.
If you click on a group, you will access the chat. Here, you can communicate with the participants via message, voice note, or pictures throughout the session. Under “Events,” you can see how the learners proceed — for example, whether they use hints and whether they need multiple attempts to solve a task.
On the right side of the view, there is a map showing the tasks and the joined groups (provided they activate GPS). Through numbering and colour coding, the groups on the map can be easily found again in the list.
Step 3 – Additional functions in “Ongoing”
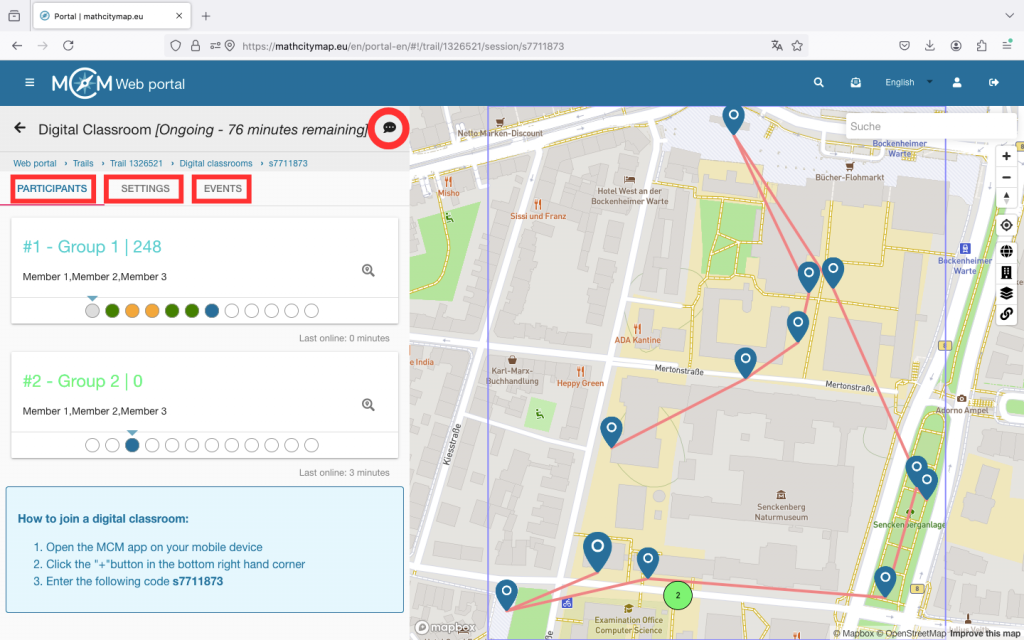
At the top right, there is a chat icon. By clicking on it, you can send a message to all participants at once. Use this, for example, for time-related hints.
Under “Settings,” you can, for instance, extend the session duration or adjust your view. You will also find some information about your digital classroom there.
Under “Events,” you can see all the actions of the joined groups. For a more compact view, select individual groups and then go to “Events.”
To remove members, click on the corresponding group and then click on the X in the top right. Confirm the action with “OK.”

Step 4 – Manage upcoming digital classrooms
Up to 30 minutes before the start of the session, you can adjust the settings of your digital classroom.
The same settings can be edited as when creating the digital classroom.
During the session and in the 30 minutes beforehand, editing is no longer possible.
Step 5 – Manage completed digital classrooms
Up to 6 months after the session, the collected data of the digital classroom can still be viewed.
For example, you can gain insights into which tasks were easy for the learners and which may have caused problems more frequently. These can be discussed again during a joint review session.


