Step 1 – Open the Trails Section
Click on the “Add Trails” field on the start page.
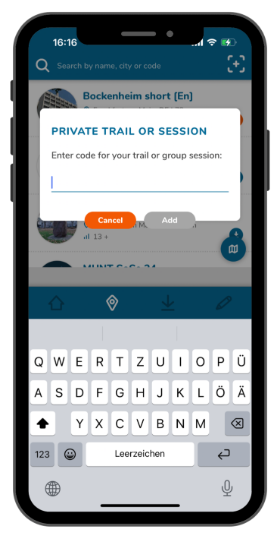
A window titled “Private Trail or Session” will open.
Alternatively, you can access this view by clicking the plus symbol in the top right corner of “Browse Trails.”

Step 2 – Enter the Code
Each trail has its own code so that it can be shared specifically with other MCM users.
Enter the relevant code in the window that appears and click on “Add”.
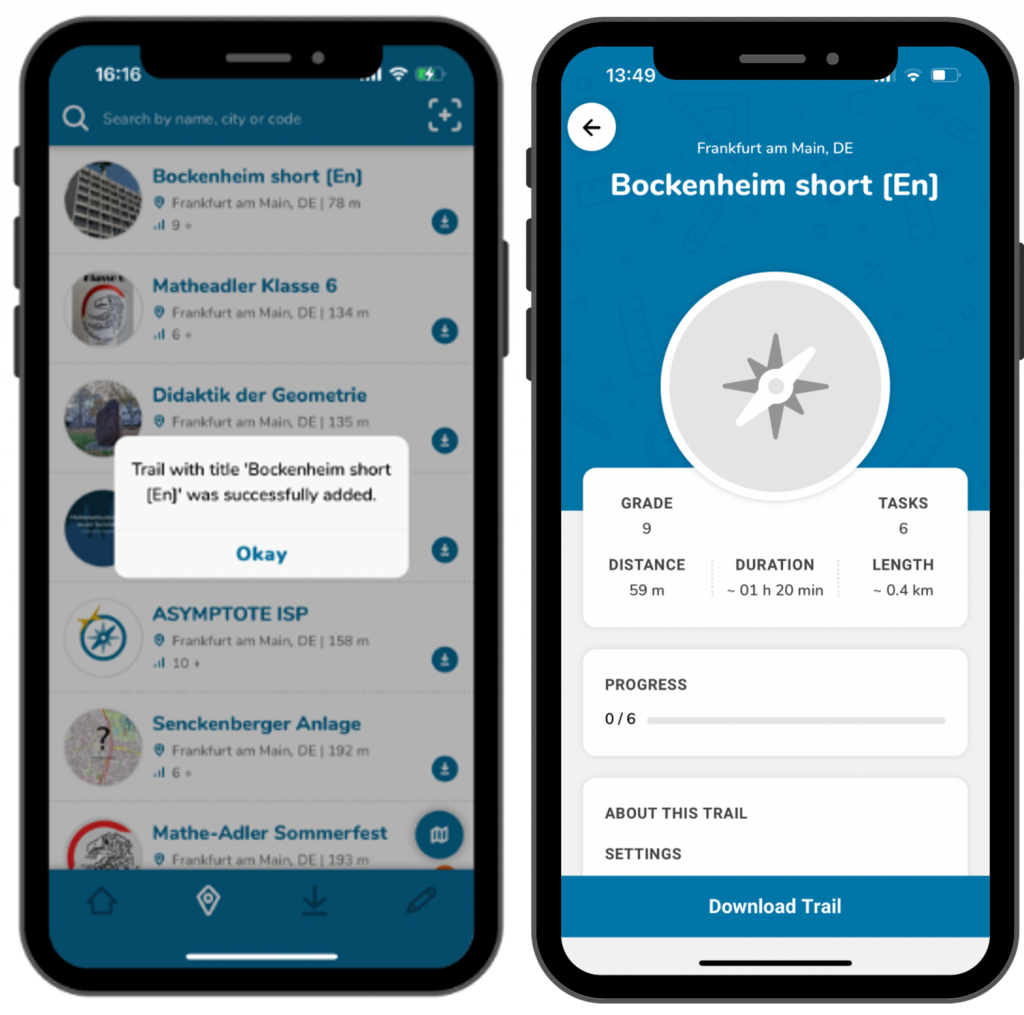
Step 3 – View Information
You will receive a notification confirming the trail has been successfully added. After clicking “Ok,” the trail’s details will appear.
This includes grade level, distance from your current location, duration, and length (the route you need to walk).
To ensure this trail is available later in your saved trails, click “Download Trail.”