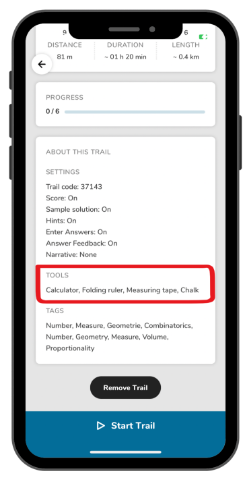
Step 1 – Preparation
Before starting the trail, gather any measurement tools you might need. The trail’s information will specify which tools are required.
If you’ve already downloaded the trail, no internet connection is necessary outdoors.
Step 2 – Navigate to the First Task
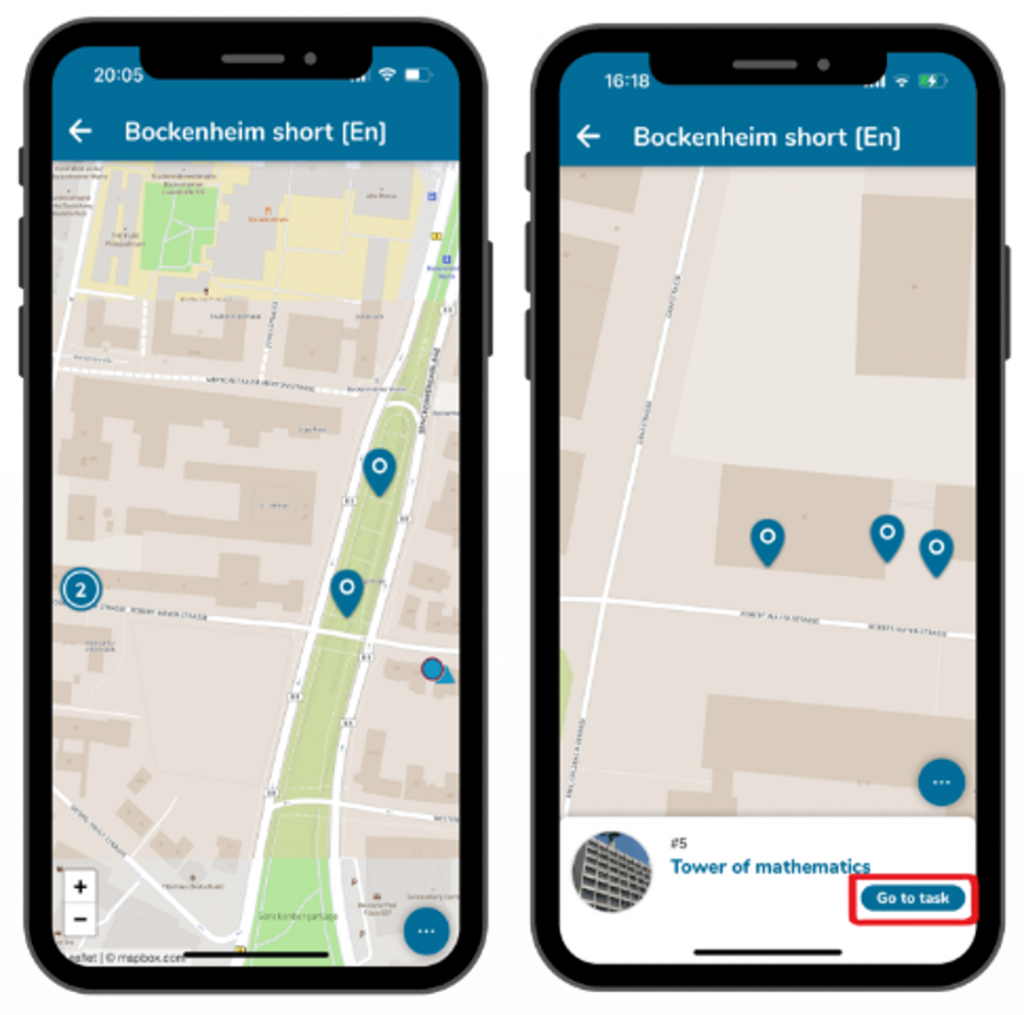
Egal ob du dir eine Startaufgabe aus der Liste oder direkt von der Karte ausgewählt hast, es wird dir dein aktueller Standort und der Standort der Aufgabe angezeigt.
Laufe nun zu der ersten Aufgabe, das Titelbild hilft dir dabei den genauen Ort zu bestimmen.
Klicke unten auf dem Bildschirm auf das blaue Feld “zur Aufgabe”, damit du die Fragestellung lesen und mit dem Bearbeiten beginnen kannst.
Step 3 – Solve the First Task
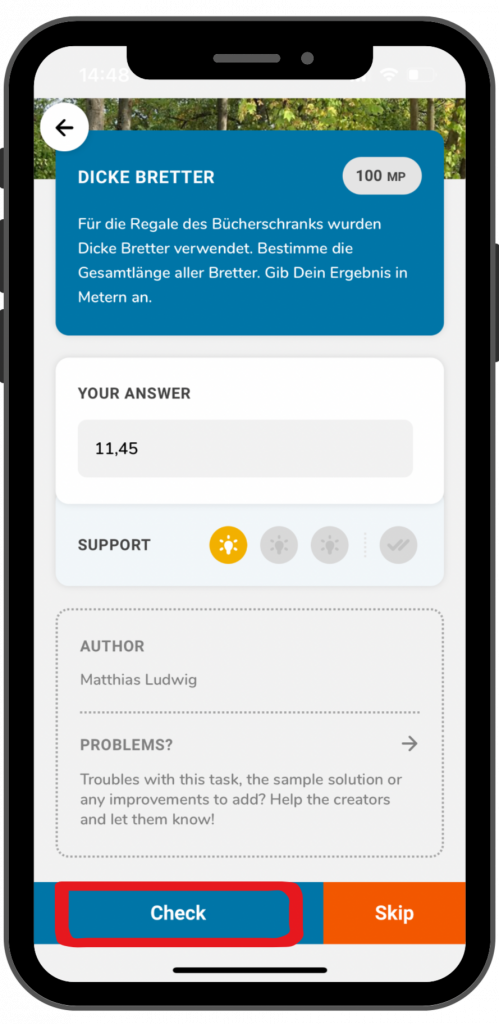
Take the necessary measurements and calculate your solution.
Enter it in the answer field and click “Check” to save it.
You’ll receive feedback on whether the task was solved correctly.
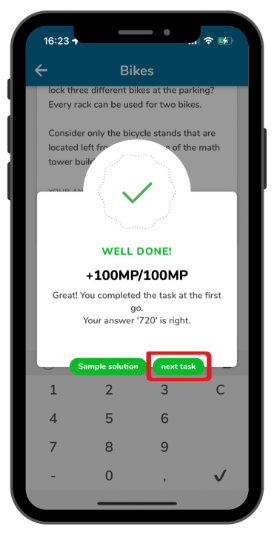
Step 4 – Feedback
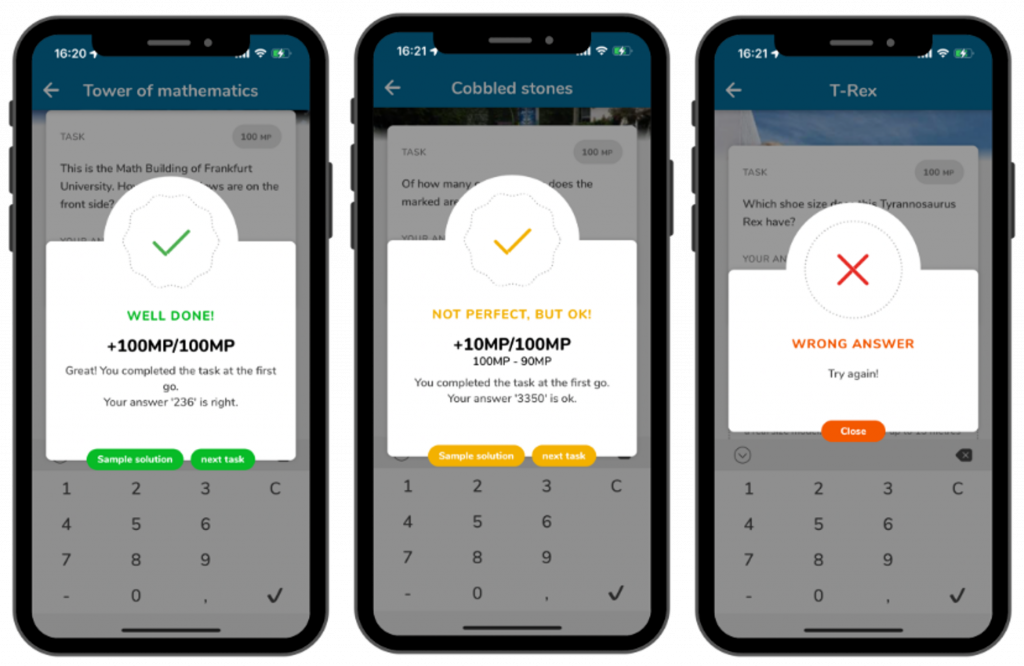
If you have solved the task correctly, a green tick will be displayed and you will receive the full score.
You may receive an orange tick for tasks with a solution interval, for example. In this case, your answer is within a satisfactory range, but could be more accurate.
A red X is displayed if the task has not been solved correctly. You then have the option of entering a new solution. If you enter several incorrect solutions, points will be deducted from the task.
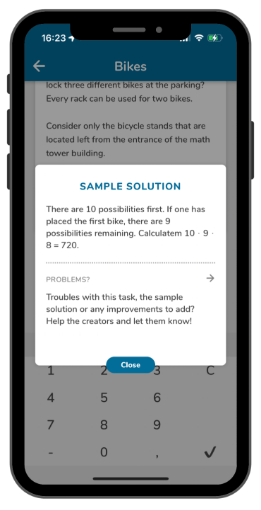
Step 5 – View Sample Solution
After solving a task or exceeding the allowed attempts, you can view the sample solution. To do this, click on the “Sample solution” field.
There you can see, for example, whether there are alternatives to your solution. If you are in the yellow range of the solution, you can see where you may have made measurement or calculation errors.

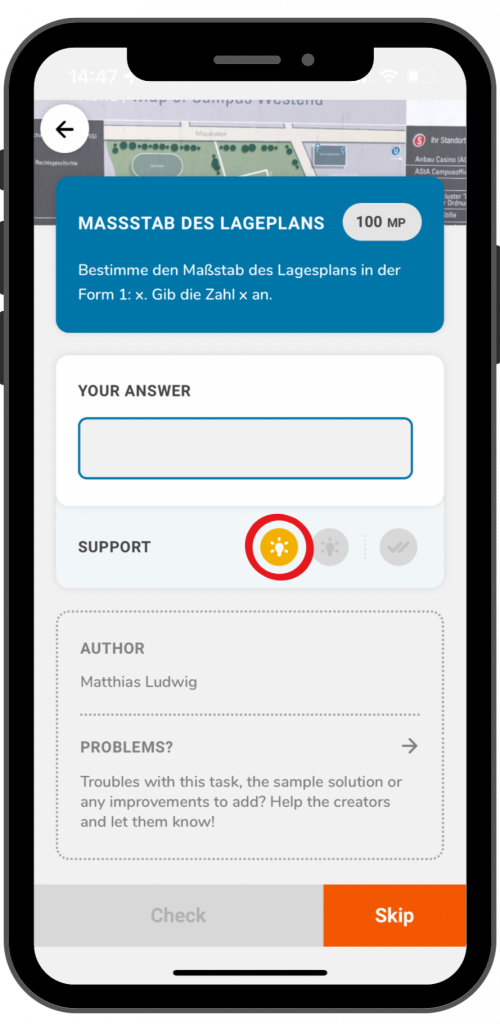
Step 6 – View Hints
If you are stuck on a task, the step-by-step hints can be helpful.
Click on the light bulb symbol to display a hint.
Then try to find a solution or, if necessary, look at the next clue.
Step 7 – Move to the Next Task
Once the solution is accepted, a button will appear prompting you to proceed to the next task.
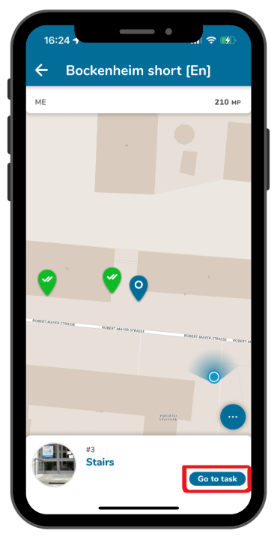
Click “Next Task” to display the map and the next recommended task.
You can click “Go to Task” or choose a different one.
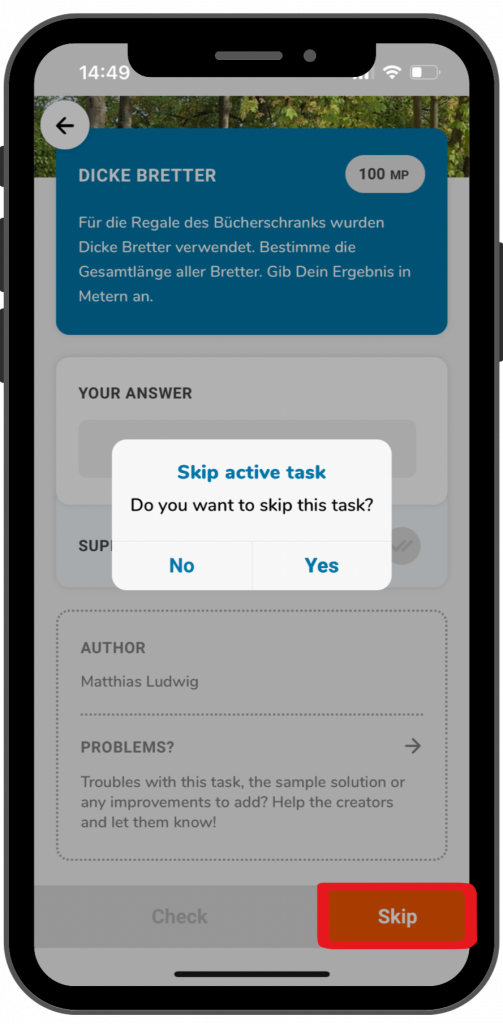
Step 8 – Skip a Task
If you cannot solve a task or want to return to it later, you can skip the task.
Click the orange arrow and confirm by selecting “Yes”.
The skipped task will appear as a grey arrow on the map, reminding you to revisit it later.
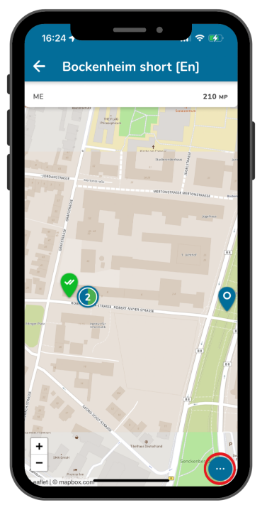
Step 9 – Access Additional Features
Clicking the three dots at the bottom opens additional features.
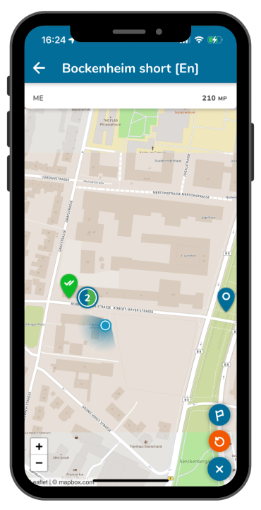
Firstly, you can click on the blue flag symbol. This will give you an overview of the trail’s tasks and you can also select which one you would like to work on next.
Secondly, you can click on the orange arrow symbol. This allows you to reset your progress on the tasks. If you want to do this, you must click on the arrow symbol and then confirm with “Yes”.
If you click on the X, these two fields will disappear, and the three dots will be displayed again.
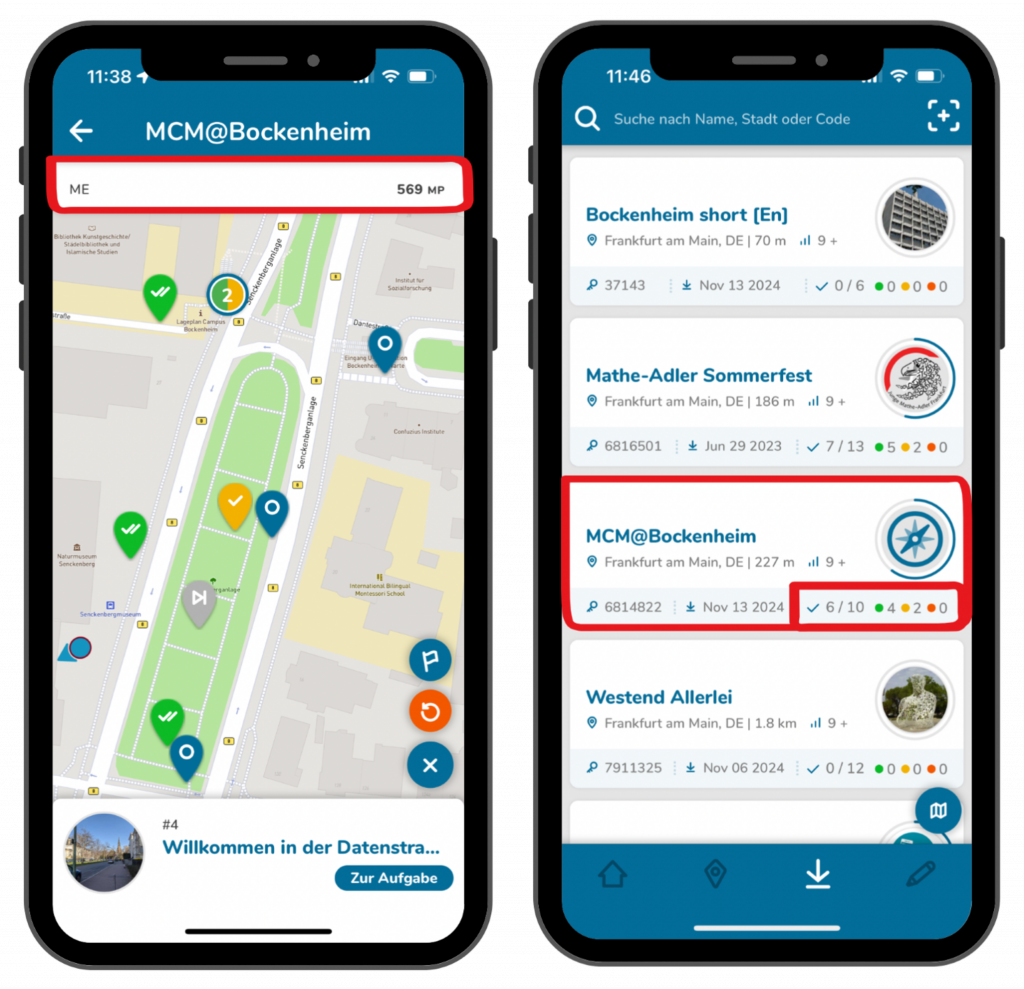
Step 10 – Finish the Trail
Once you have completed all the tasks, you can finish the trail. You can also pause the trail at any point.
To leave, click on the white arrow at the top left corner.
Your score is displayed at the top and you can also see your progress in the trail information.

